Lapping your CPU: a handy guide
Lapping a CPU heat spreader is generally one of those activities reserved for hardcore overclocking enthusiasts. Not because it’s particularly difficult, but because your average consumer probably doesn’t want to rub their brand new expensive processor against a sheet of sandpaper for a few extra megahertz. Though for those of us who are willing to yet are unfamiliar with the process, I’ve prepared this handy picture-filled guide.
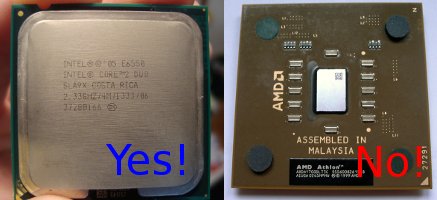
Firstly, check if your CPU is even able to be lapped. As long as it has a metal heat spreader, you’re in good shape. If the core is exposed, you absolutely DO NOT want to lap it. Most modern desktop processors include a heat spreader, but not all laptop processors do. Have a look at the difference:
So assuming you’ve got a processor that looks like the one on the left, you can begin. You’re going to need an absolutely flat surface. I generally go to the hardware store and get a small pane of glass cut for just this purpose. You will also need 4 or more sheets of wet/dry metal sandpaper in ascending grit ratings. For example, you may want a sheets of 220, 400, 800, and 1600 grit. This is a minimal suggestion, making smaller incremental steps between grit levels will allow you achieve a better final polish, but will take much longer. Doing the final polish with a piece of 2000 grit sandpaper will create the best mirror-like finish, which is what we’re after.
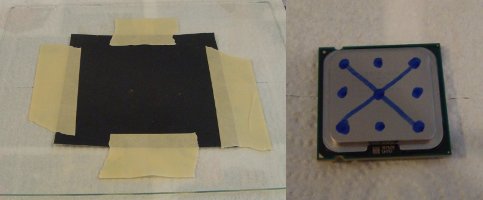
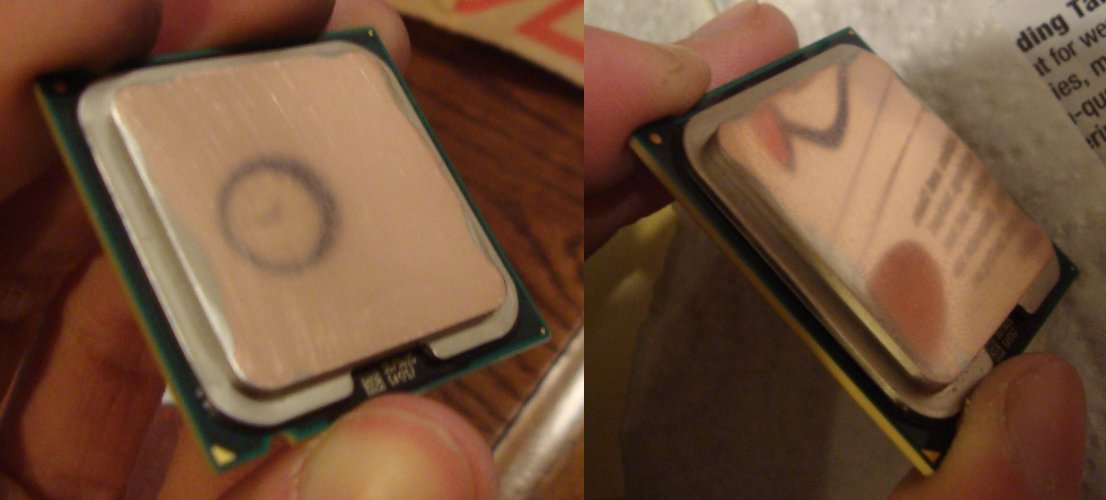
On the left is my lapping surface, a sheet of sandpaper taped to a small pane of glass. On the right is my CPU with a symmetrical pattern drawn on the top. This pattern is so that we can judge whether we are sanding evenly or not. The pattern should disappear at roughly the same rate across the surface of the heat spreader. Start with a piece of rough sandpaper (220 grit, for example) for the first pass. You may dampen the sandpaper slightly if you wish, but it is not required. Face the CPU top down on the sandpaper, and while pressing firmly in the center move it in a consistent pattern such as a figure eight or circle. Just going side to side or in any random direction will not sand the surface evenly.
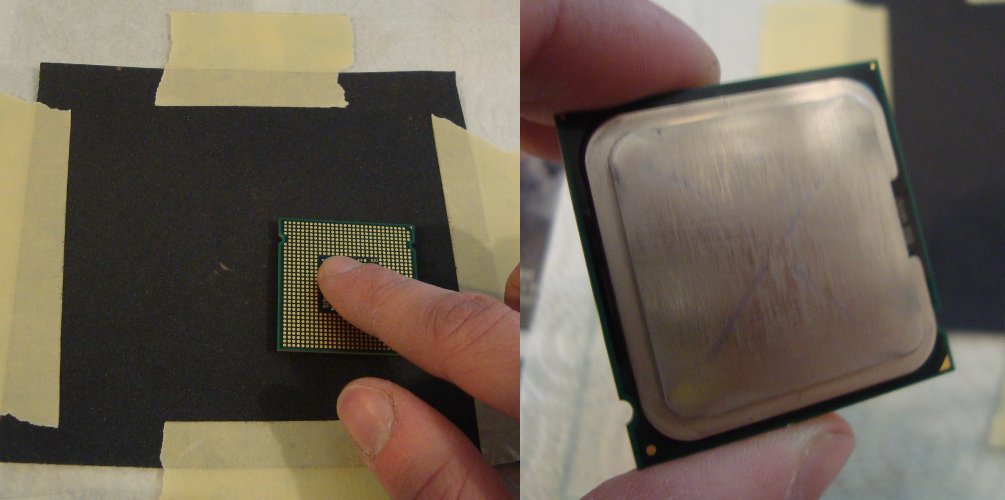
You can see on the left how I am pressing on the CPU while sanding, and how the process described above will begin to grind away the surface evenly. You will want to continue to use a low grit sandpaper to grind away the surface until the copper layer of the heat spreader is exposed. After most of the non-copper heat spreader surface is gone, we can jump up to the next level of sandpaper grit to begin polishing.
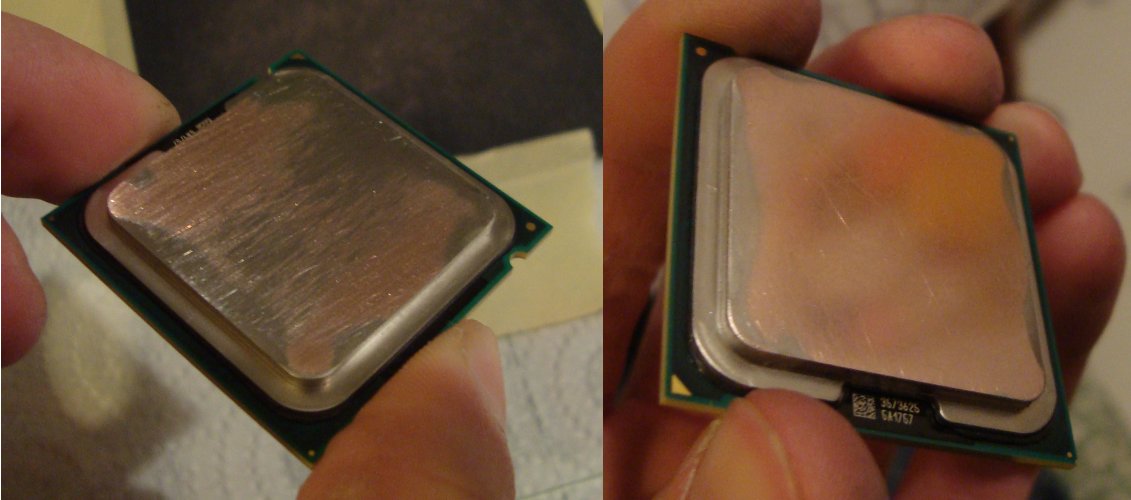
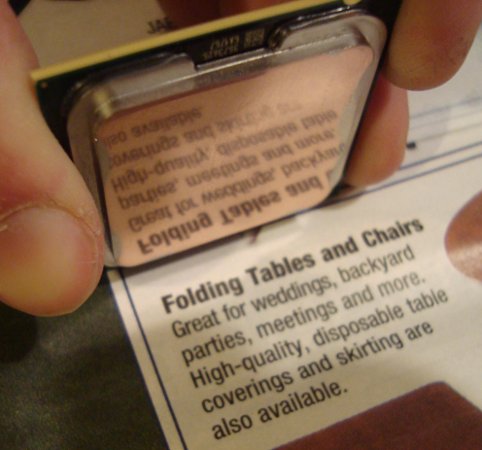
On the left the copper is beginning to be exposed, on the right it is nearly all exposed and I have begun polishing. The polishing process is straightforward. After jumping up to the next level of sandpaper (400 from 220, or 800 from 400, etc.), sand until the deep(er) scratches left by the previous sandpaper are removed. Continue this until you are at 1600-2000 grit sandpaper, which will be for your final polish. There should be no visible gouges or significant scratches on the surface once you reach this level, they will have been smoothed by the previous passes of incrementally higher grit sandpaper. With 2000 grit sandpaper, you should be able to achieve a near-mirror like surface. This will make it easy to tell if you have sanded evenly, text reflected from the surface should be easily readable and un-distorted.
The above image shows the polish process fairly far along. Not quite a mirror finish yet, but getting there. This level of polish can be achieved with sandpaper in the range of 1000-1600 grit. You won’t be quite done until you’re on 2000 grit for a while and get a polish like that in the picture below.
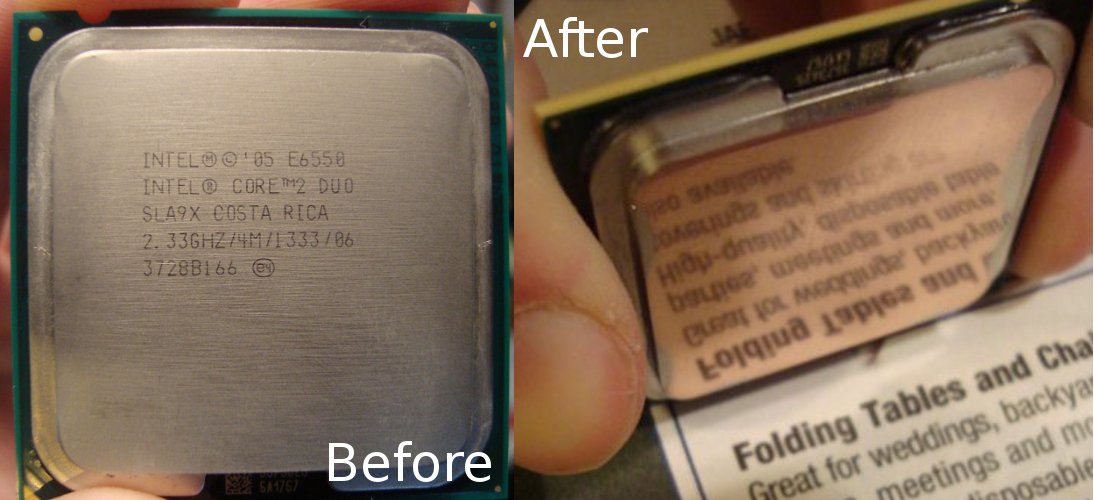
Once your polish reaches this level, you’re pretty much done! You could continue to polish with higher grit sandpaper until you’ve got an absolutely flawless finish, but that is at your discretion. The main point of lapping the heat spreader is to eliminate unevenness and grooves in the surface (like the laser engraved text) that will impair heat transfer from the CPU to heat sink. This is why we use thermal paste, to fill in those grooves for more efficient transfer of heat than air alone would allow. Having a completely flat surface with no grooves lets the thermal paste spread more evenly and allow the most efficient transfer of heat that we can achieve with simple tools. After lapping your CPU, you should absolutely see temperature drops from a few to tens of degrees Celsius. Gains aren’t always huge, but I’ve yet to see a lapped CPU running hotter than a non-lapped CPU, all else being equal. CPU lapping is especially beneficial with water cooling, which most super-hardcore over-clockers are going to be using anyway. I only use air cooling, and this is just one way to have a slight thermal advantage in exchange for a little elbow grease and time. I can’t conclude this article without a proper before and after picture, so here you are. Thanks for reading, and don’t hesitate to post any questions!


WOW! this is so cool, I have never seen this before. I am really debating on if I should try this now!
Seems like a risk to try since my rig is overheating like hell. Not really an OCer, but if this’ll solve my PC issues, then I’m willing to do it — carefully. Thanks, this is the first time I’ve seen this. Wish me luck.
If you’re not in to overclocking, it’s not really worth the effort to do this. Overheating issues can be caused by a wide variety of things. I would check to make sure that your heatsink is mounted properly and try applying fresh thermal paste before attempting something as drastic as this.
How about cleaning the CPU when you’re finished lapping? There’s probably oil residue from your fingers and some sanding dust as well. Would I just wipe with isopropyl alcohol and blow with compressed air? Maybe wear plastic gloves while sanding to avoid the finger oils? How did you get the CPU clean enough for installation?
Hi Ted, thanks for your question. I did indeed just use a cotton ball and isopropyl alcohol to clean the CPU. Just be sure to allow it to dry before installation and you’re good to go!
Unfortunately this is taboo for anyone who is not an overclocker, but in reality, this is extremely necessary in some cases. ALL macbooks suffer from a poor quality heatsink, they work very hot, and apple puts too much thermal paste on the chips. It is mandatory to polish the heatsink and change the thermal paste, so that your macbook has a long useful life.