Repairing a vintage Gibson LG-0 from 1969
When I was a teenager I inherited an old acoustic guitar from a deceased relative. The guitar had been abandoned in an attic for at least ten years before that, and was in quite bad shape. We’re talking multiple cracks in the top, loose braces, finish flaking off all over the place, impossibly high action, the works! At the time I figured it was a lost cause, and it went to sleep in he back of a closet for another ten years.
Last year I ended my long hiatus from guitar playing so that I could entertain my young daughter with children’s songs. I remembered I had this old guitar and with the hand-craft experience I’ve gained over the years, I figured it deserved another look. After spending probably forty hours watching videos on Twoodfrd’s YouTube channel and reading threads on The Acoustic Guitar Forum I was ready to take a crack at repairing the guitar.
So what are we dealing with?
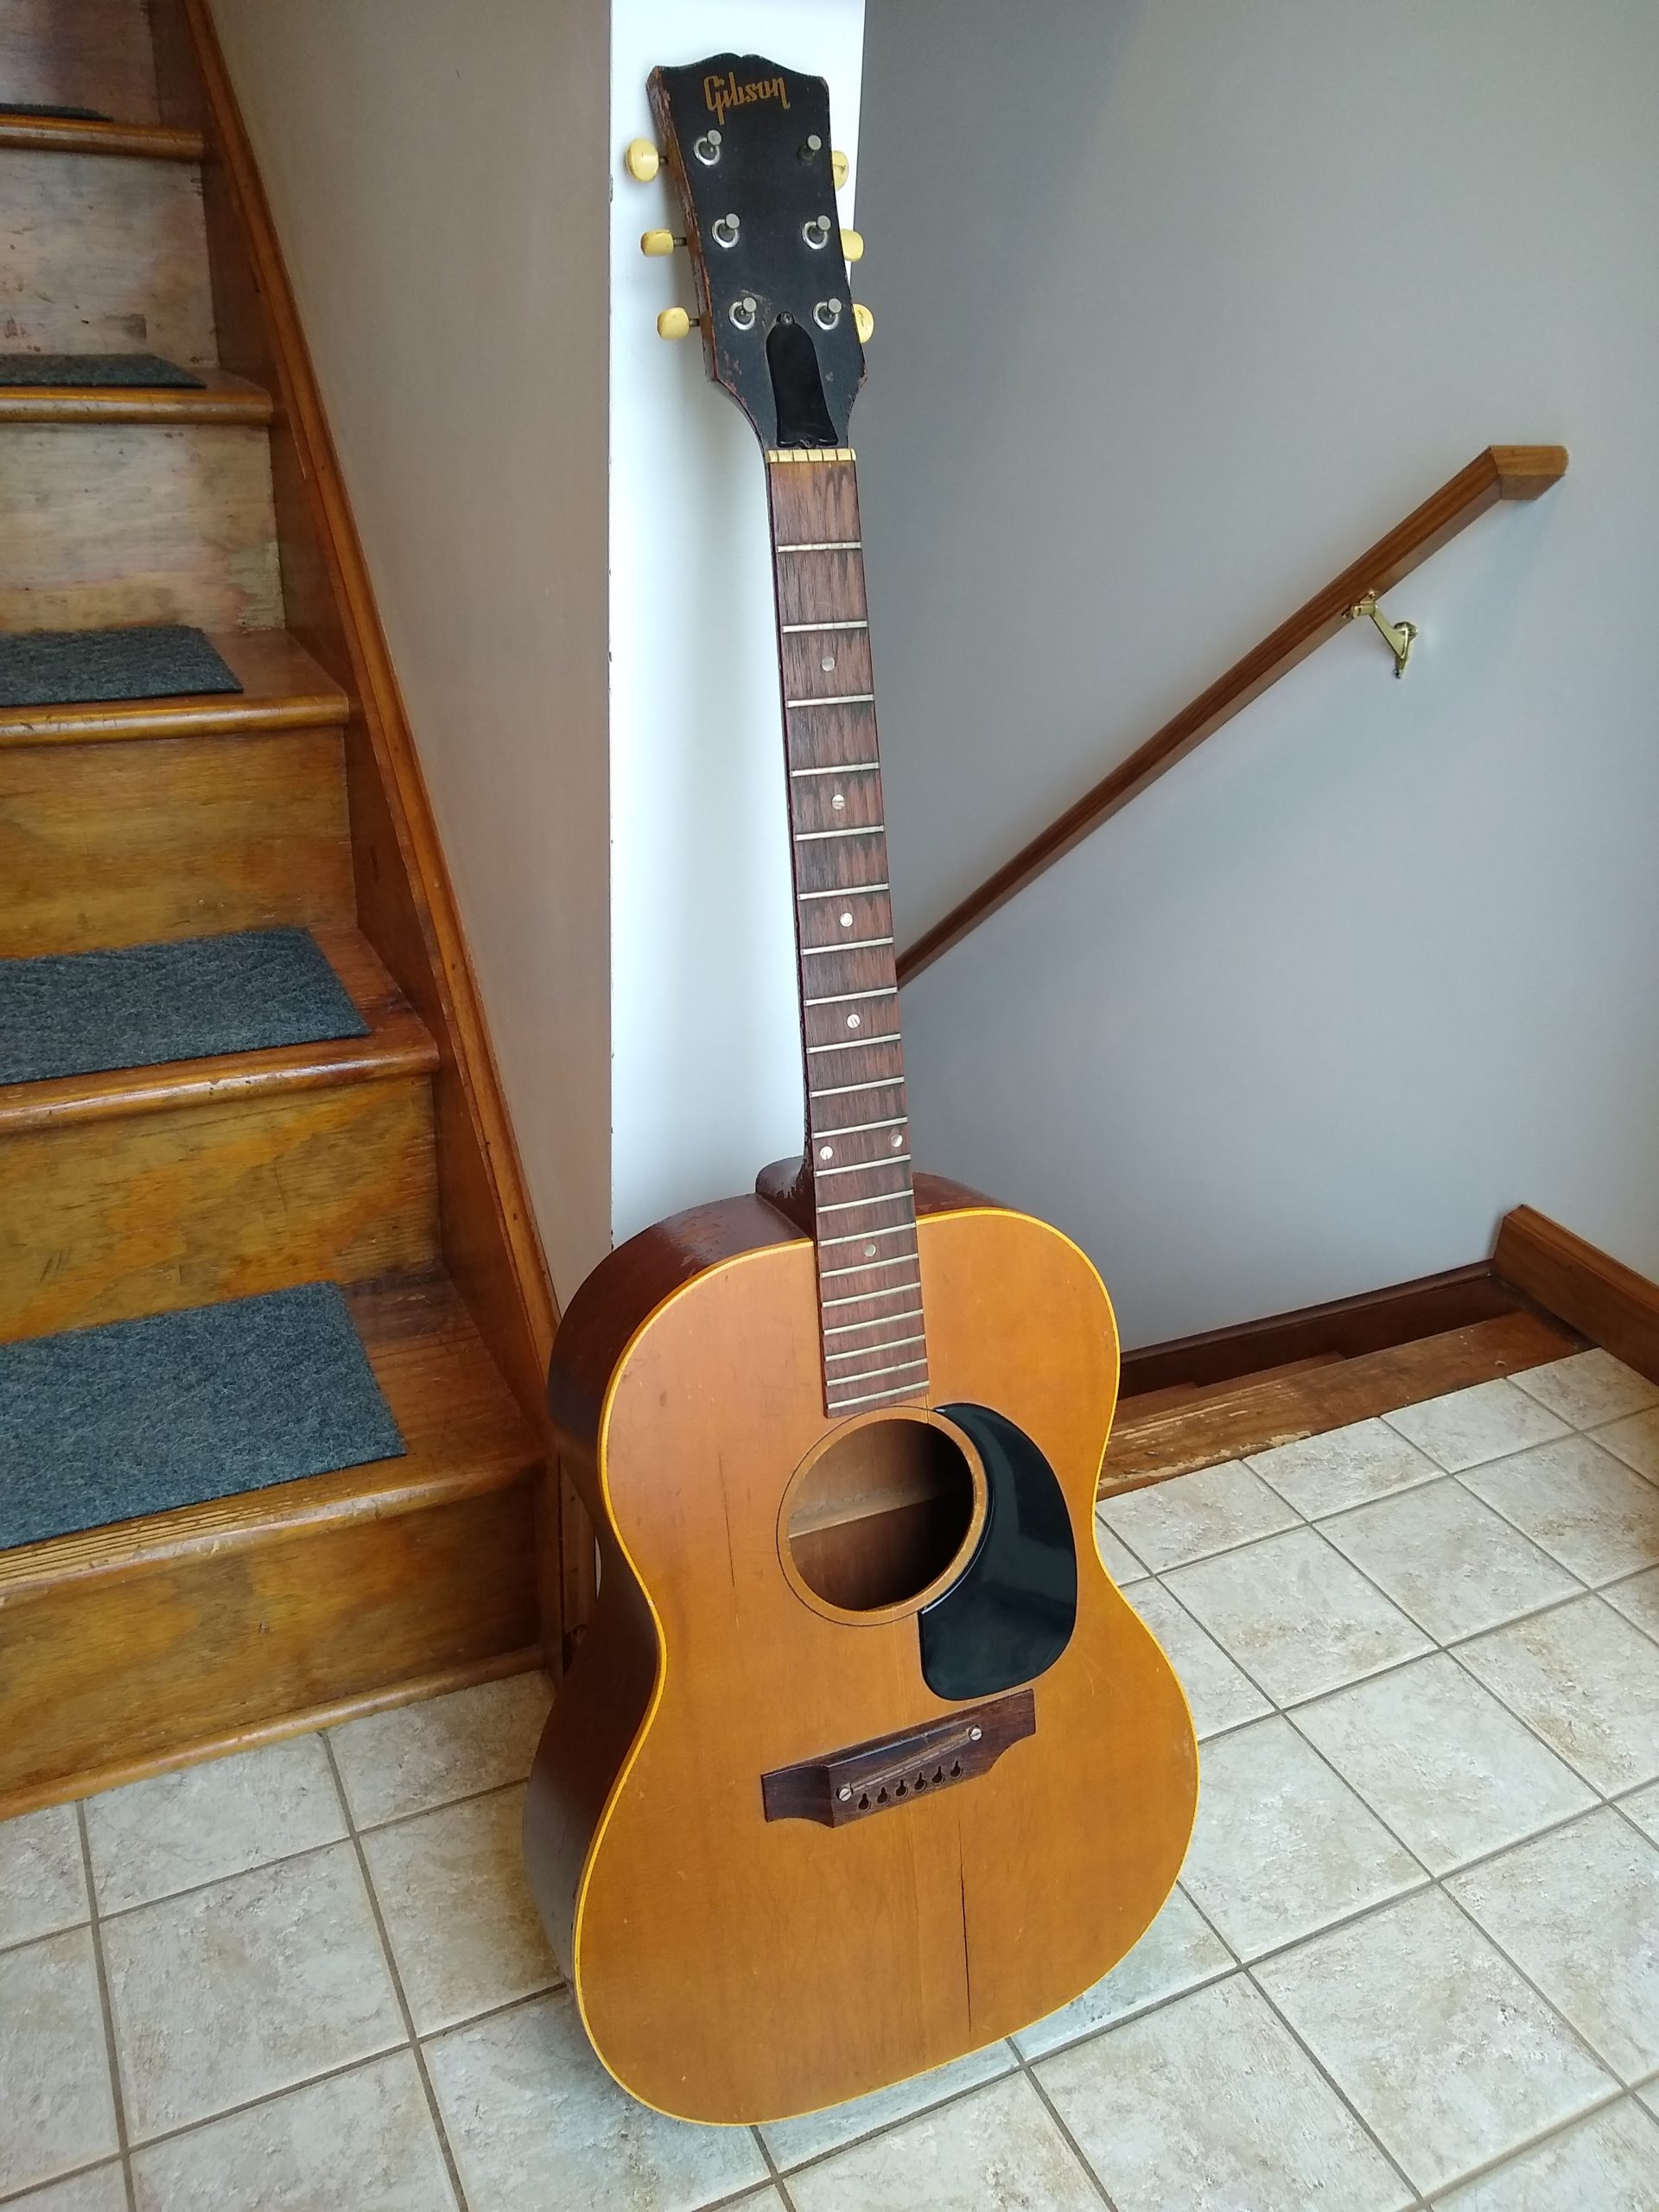
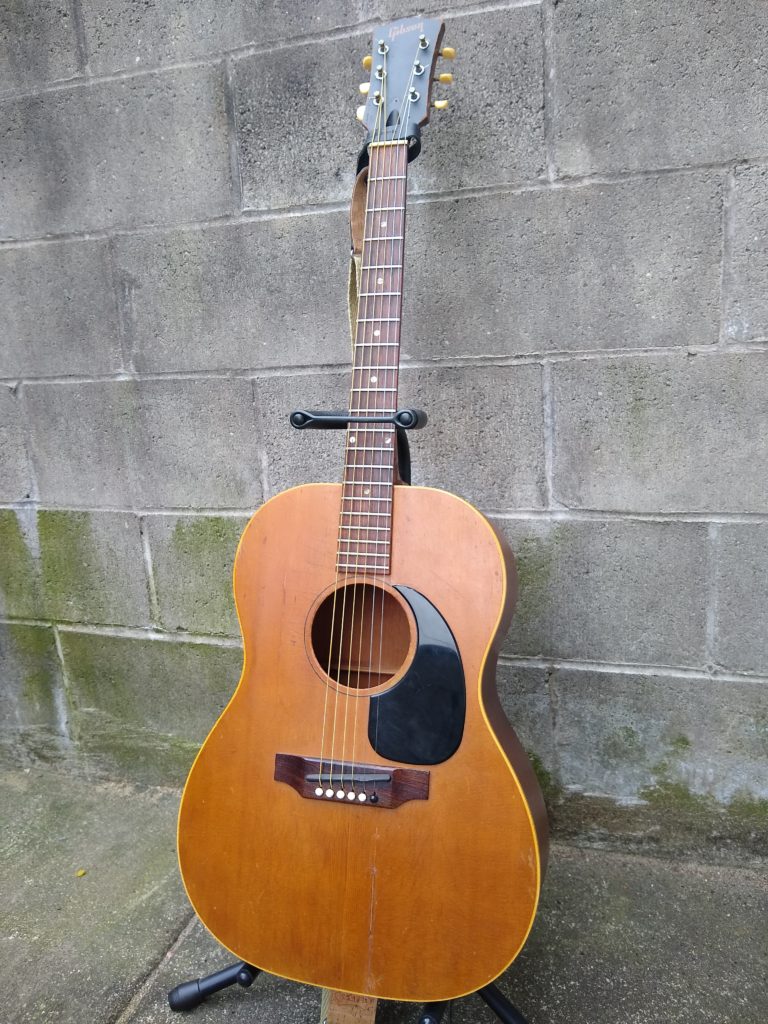
I determined from the serial number on the back of the headstock that this was a 1969 Gibson LG-0. This model was Gibson’s bottom of the line beginner level acoustic guitar at the time. It’s an odd duck actually, since the LG-0’s produced before 1969 were all mahogany, but from 1969 until the model was discontinued in 1974 they had spruce tops1. This variation was much less common due to the model’s declining popularity. The top is ladder-braced, which was common among cheaper guitars at the time and has a rather distinctive sound “boxy” upper-midrange focused sound. The 1969 model is also distinctive for it’s often-disliked 1-9/16″ nut width and thin neck.
In terms of repairs, I diagnosed it with the following problems:
- Three loose or cracked braces
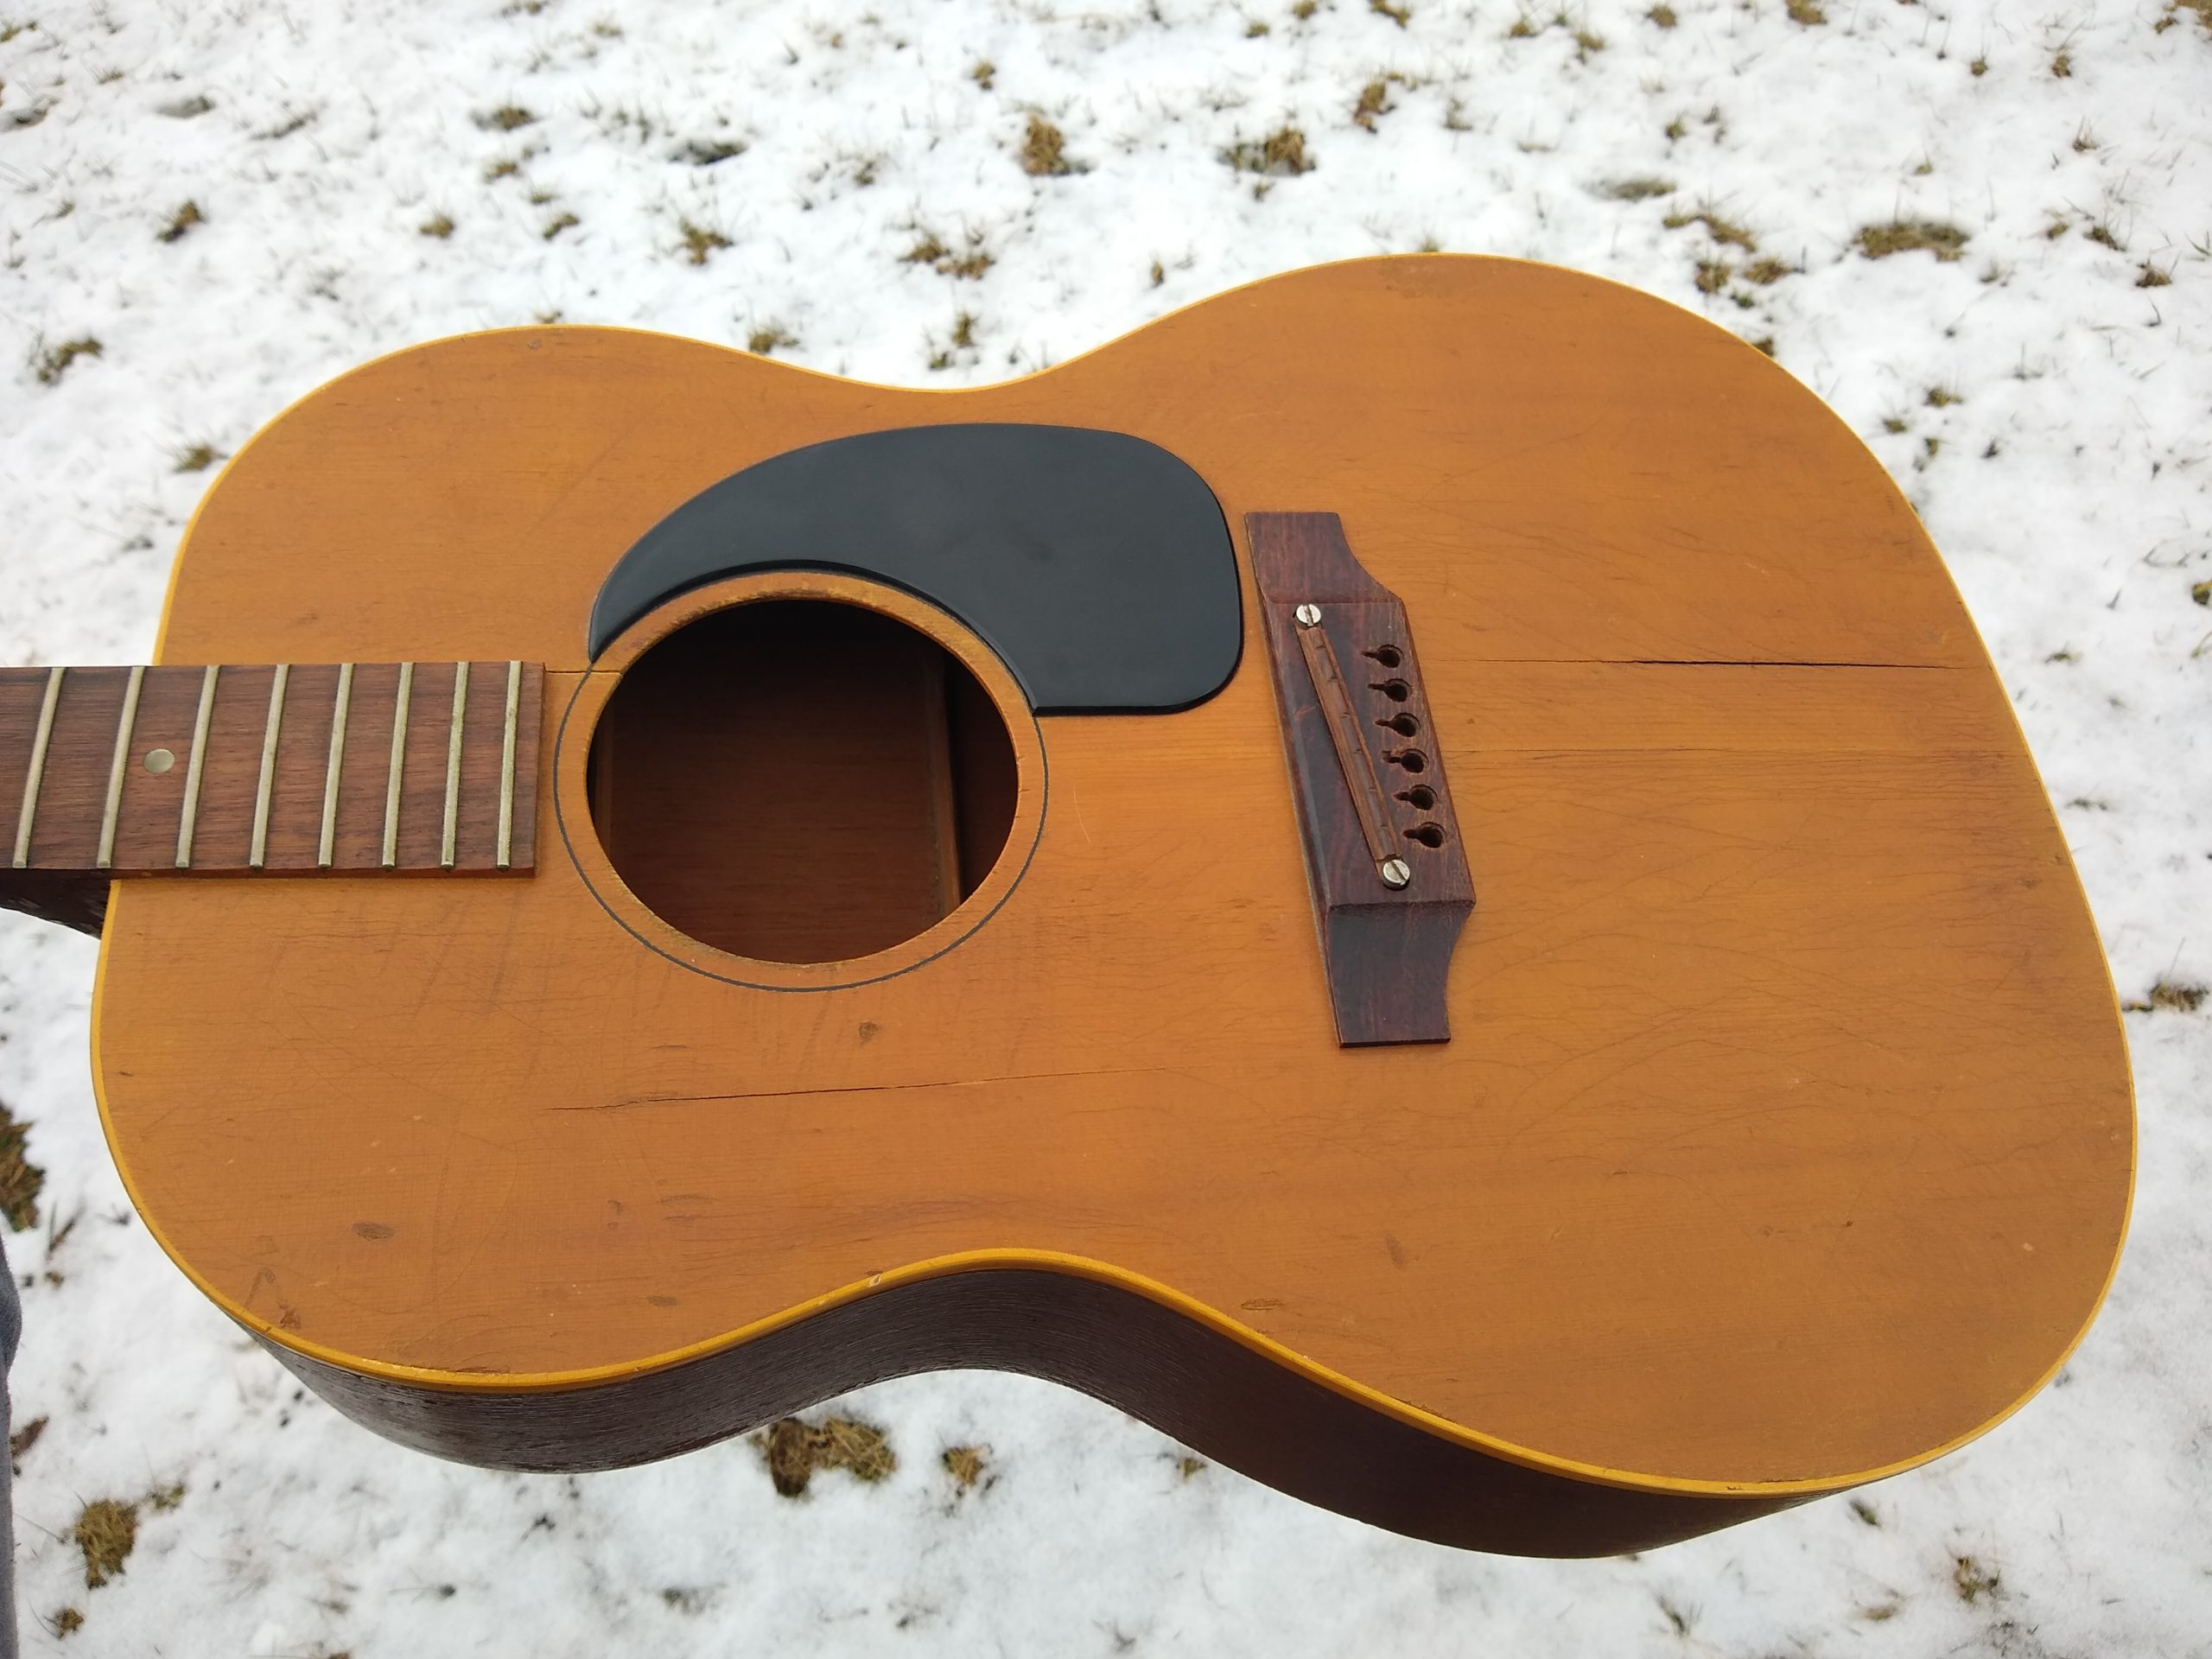
- Three cracks in the top
- Unplayable action, due to either belly bulge or needing a neck reset
- Missing tuner ferrule
- Extremely dirty fretboard
- Some fret wear
- Non-intonated adjustable wooden saddle
These are the issues I expected to fix just to get it to a comfortable playable state. Given that these sell for less than $1000 USD and the repair cost would have met or exceeded this price, you can see why I decided to do the work myself.
First time for everything
I started a thread on the acoustic guitar forum to log my repair progress and get advice as I went. I’ll summarize the highlights here.
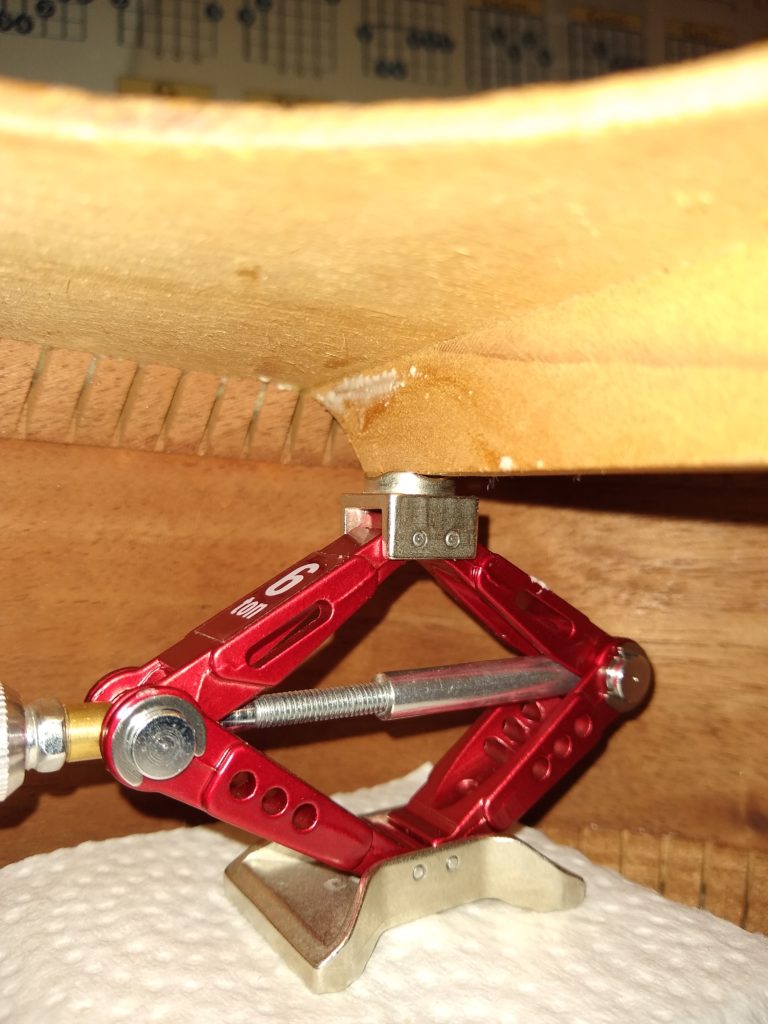
Repairing the loose and cracked braces was done by carefully sanding away the old glue and re-gluing the brace ends in place. You can’t very easily get a clamp on these and you don’t want to dent the top, so I got a tip to use a model RC car jack to hold the braces in place. There are “official guitar repair” products like this, but they’re much more expensive and do effectively the same thing.
Re-gluing the two of the three top cracks was pretty easy after having watched enough of them. Using fish glue and a suction cup, you pump the glue in to the crack. Then clamp it shut on two axes in order to keep the crack closed and the two separated pieces on the same plane (so there’s no lip once the glue dries). Afterwards you glue cleats on the underside to ensure the crack is unlikely to separate again.
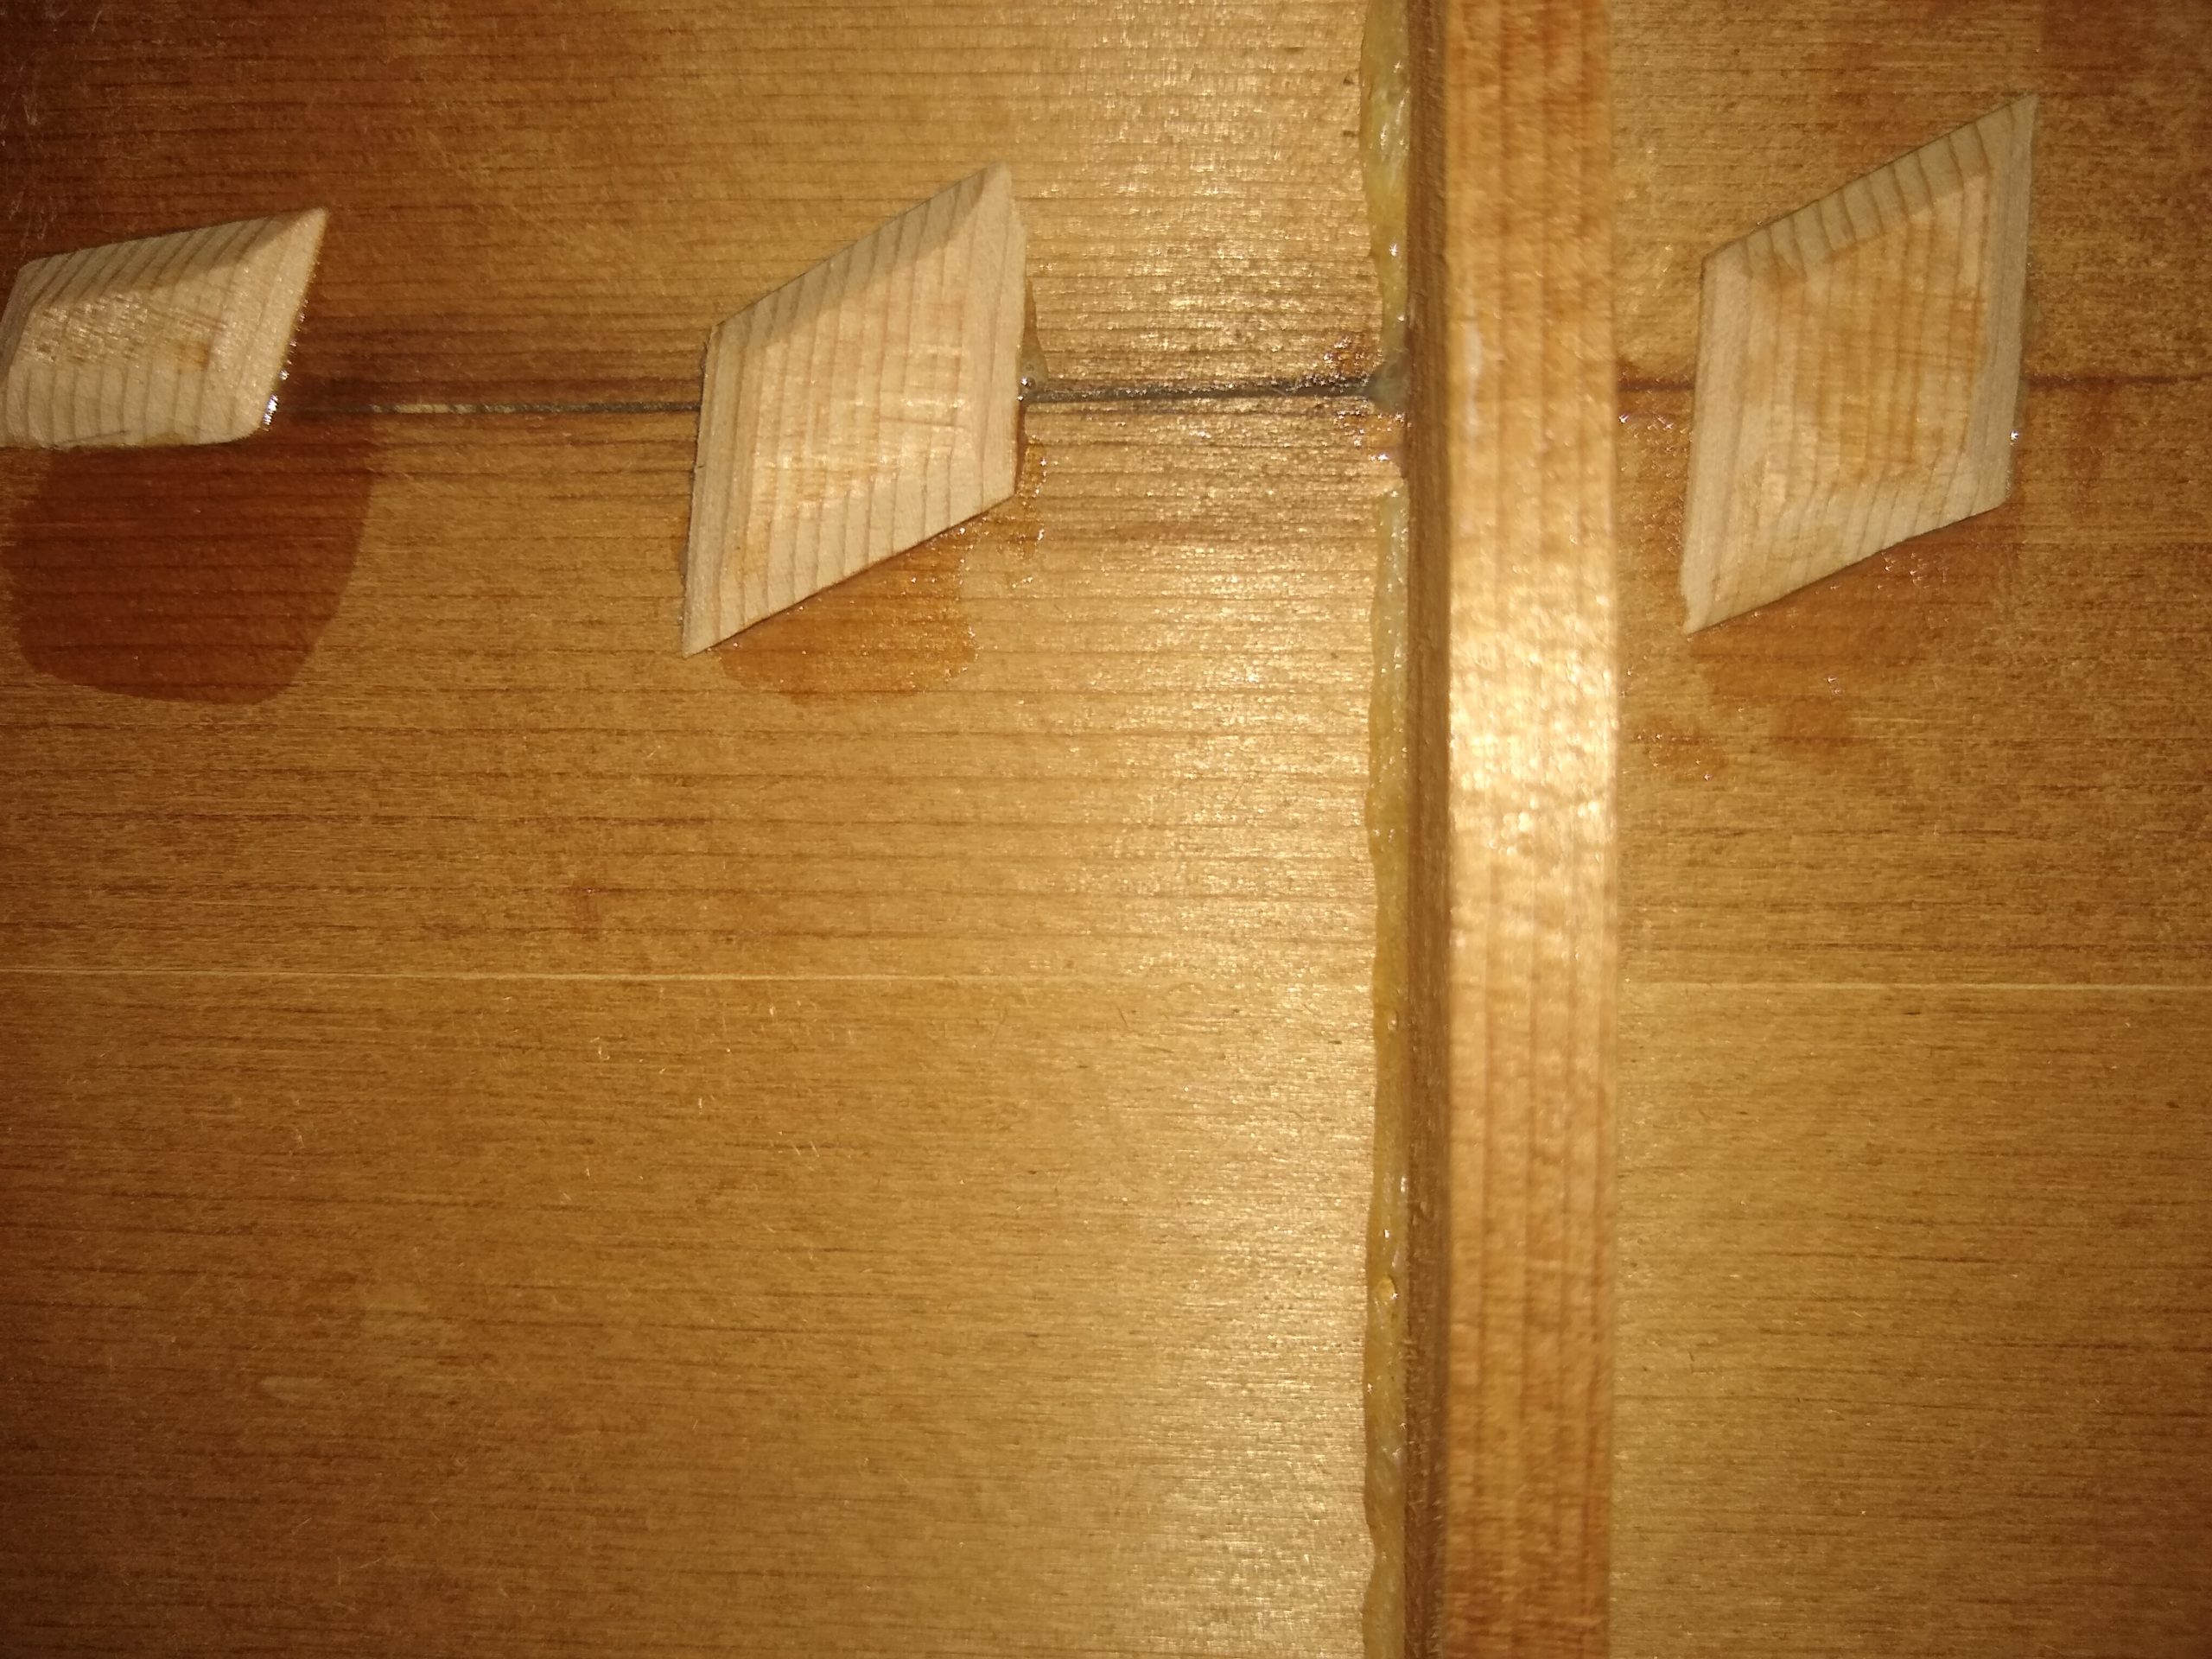
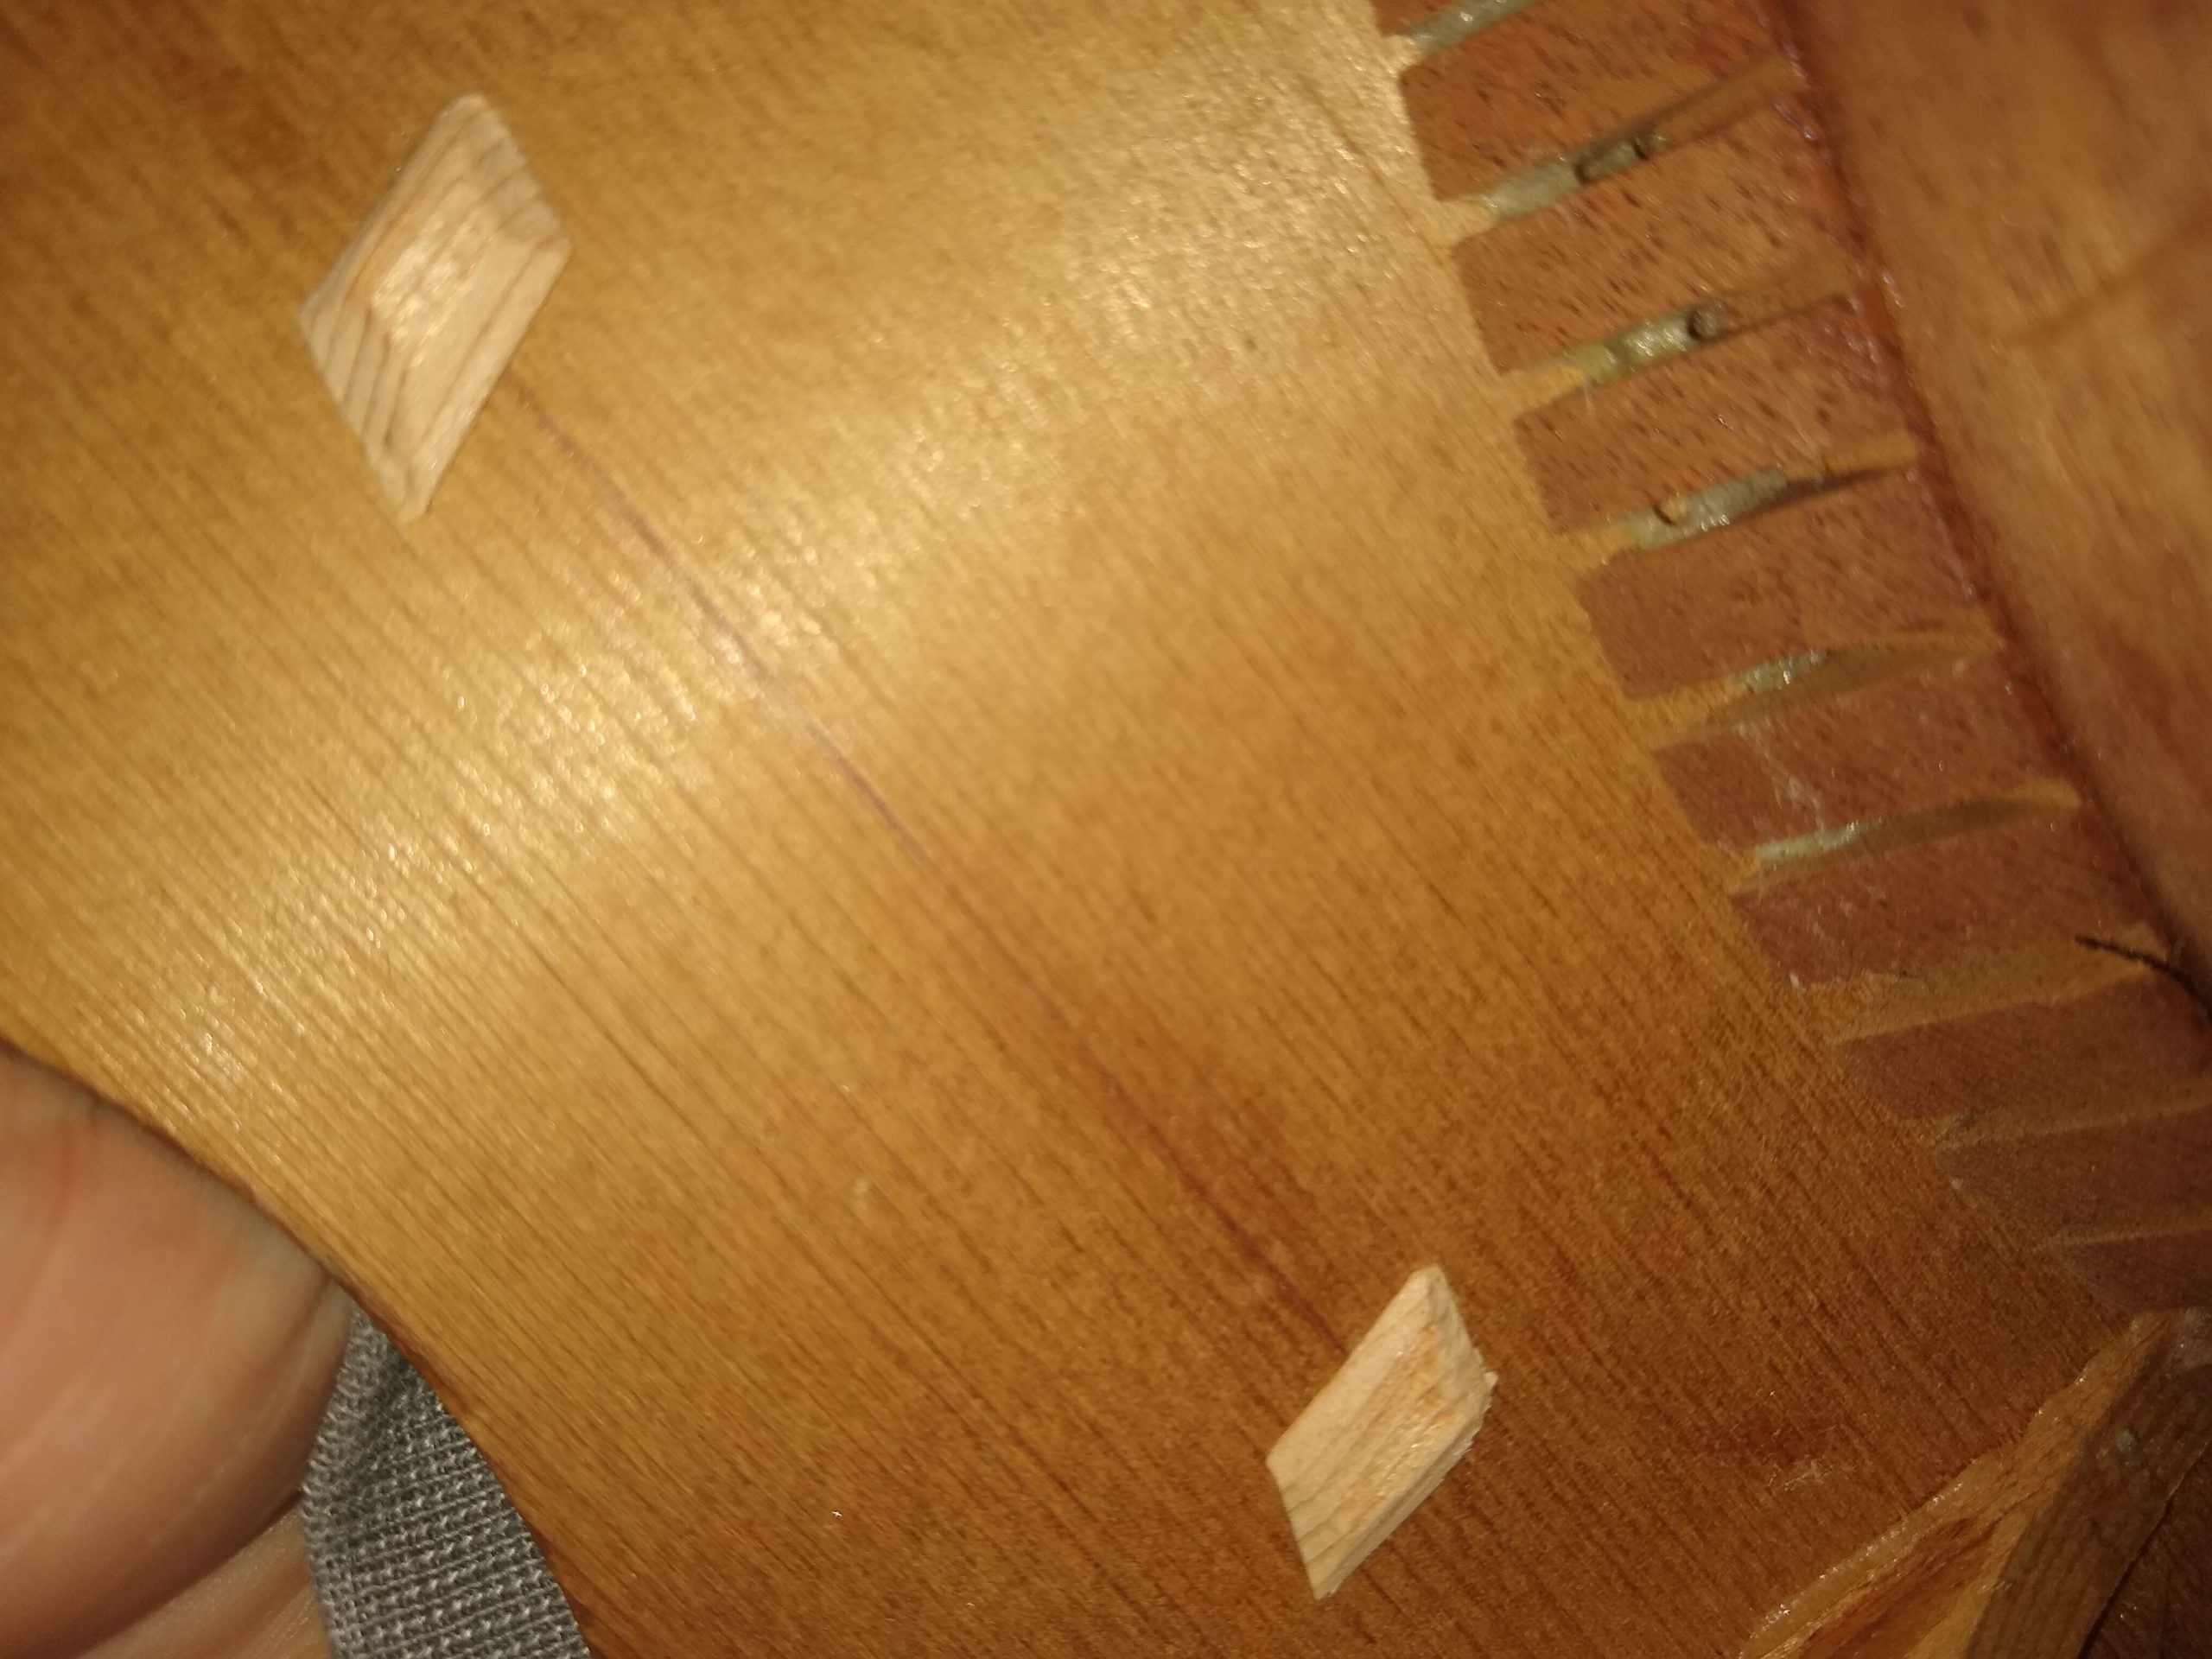
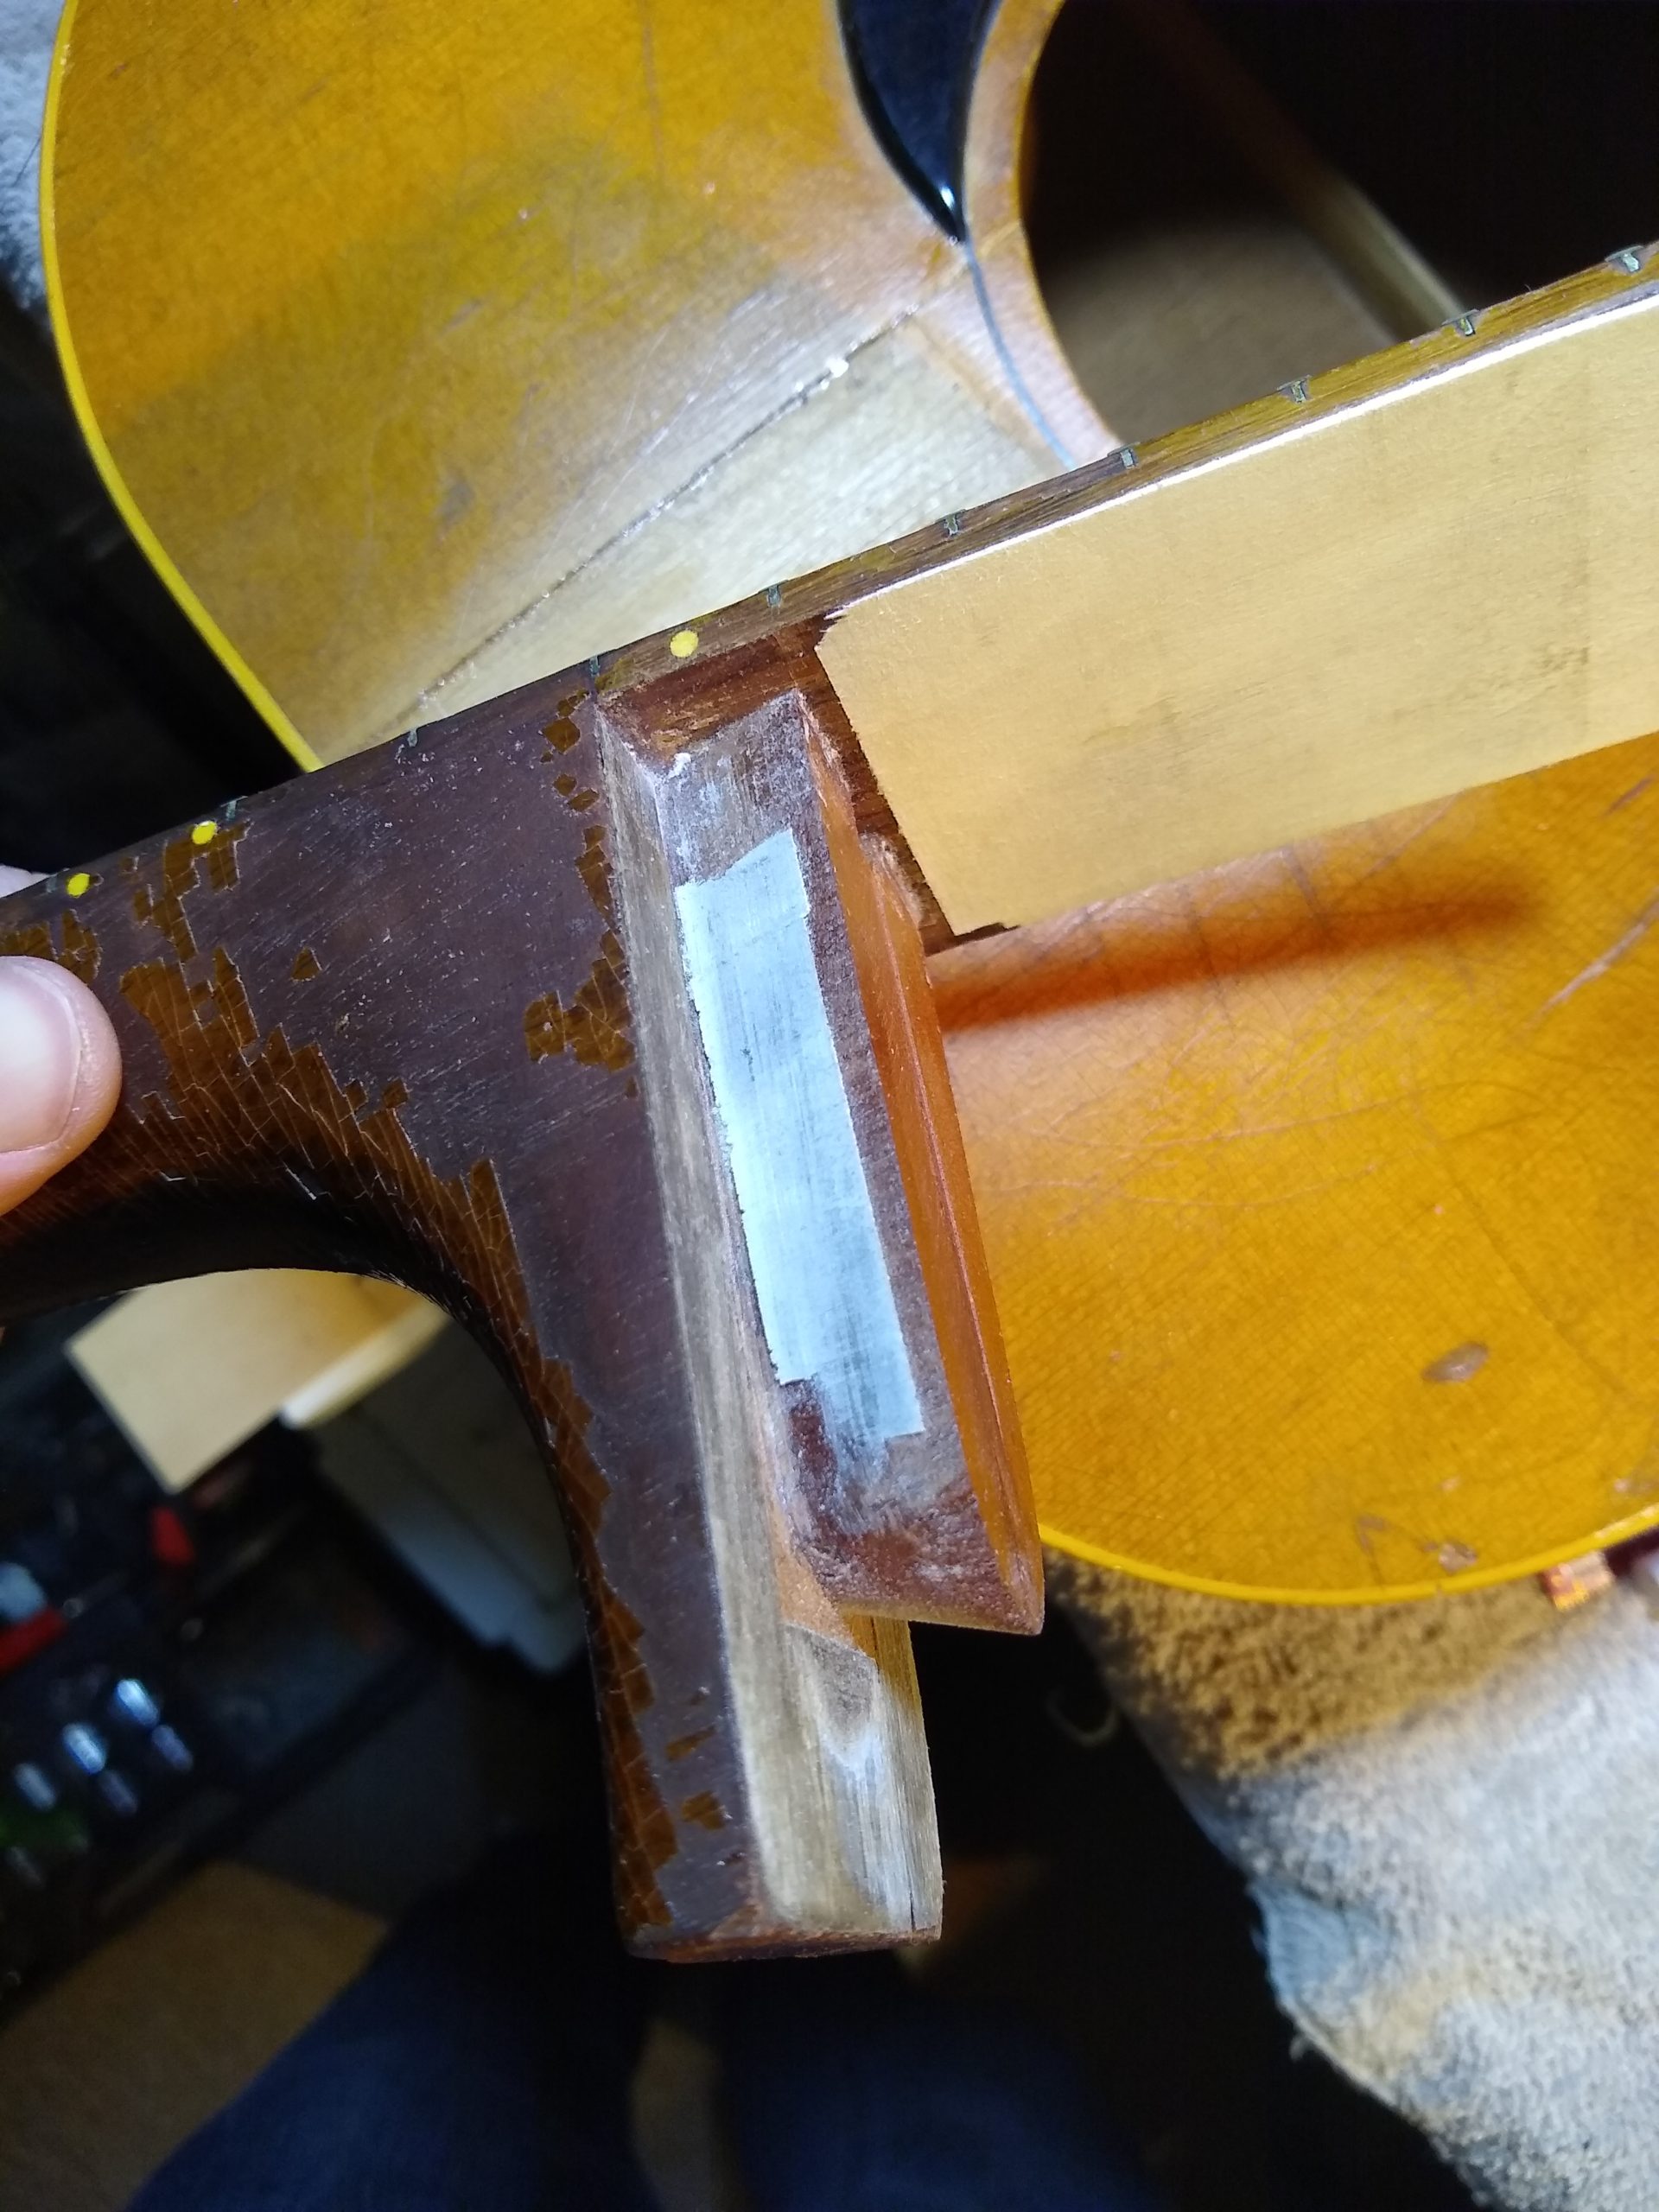
The largest crack in the lower bout of the top didn’t go together so smoothly. I had difficulty getting any movement together while clamping the lower bout, but putting weight on top removed the radius of the top and pushed the two halves (mostly) together. Unfortunately there was still a gap once the glue dried, and I attempted to insert a spline (a thin strip of same type of wood) in to the crack and glue it in place. This worked, but it doesn’t look very good. Probably could have looked better if I started out with this strategy. If I ever need to fix this crack again, I’ll probably just route it out so that the width and depth are uniform, and put in a nice spline that I can color to match.
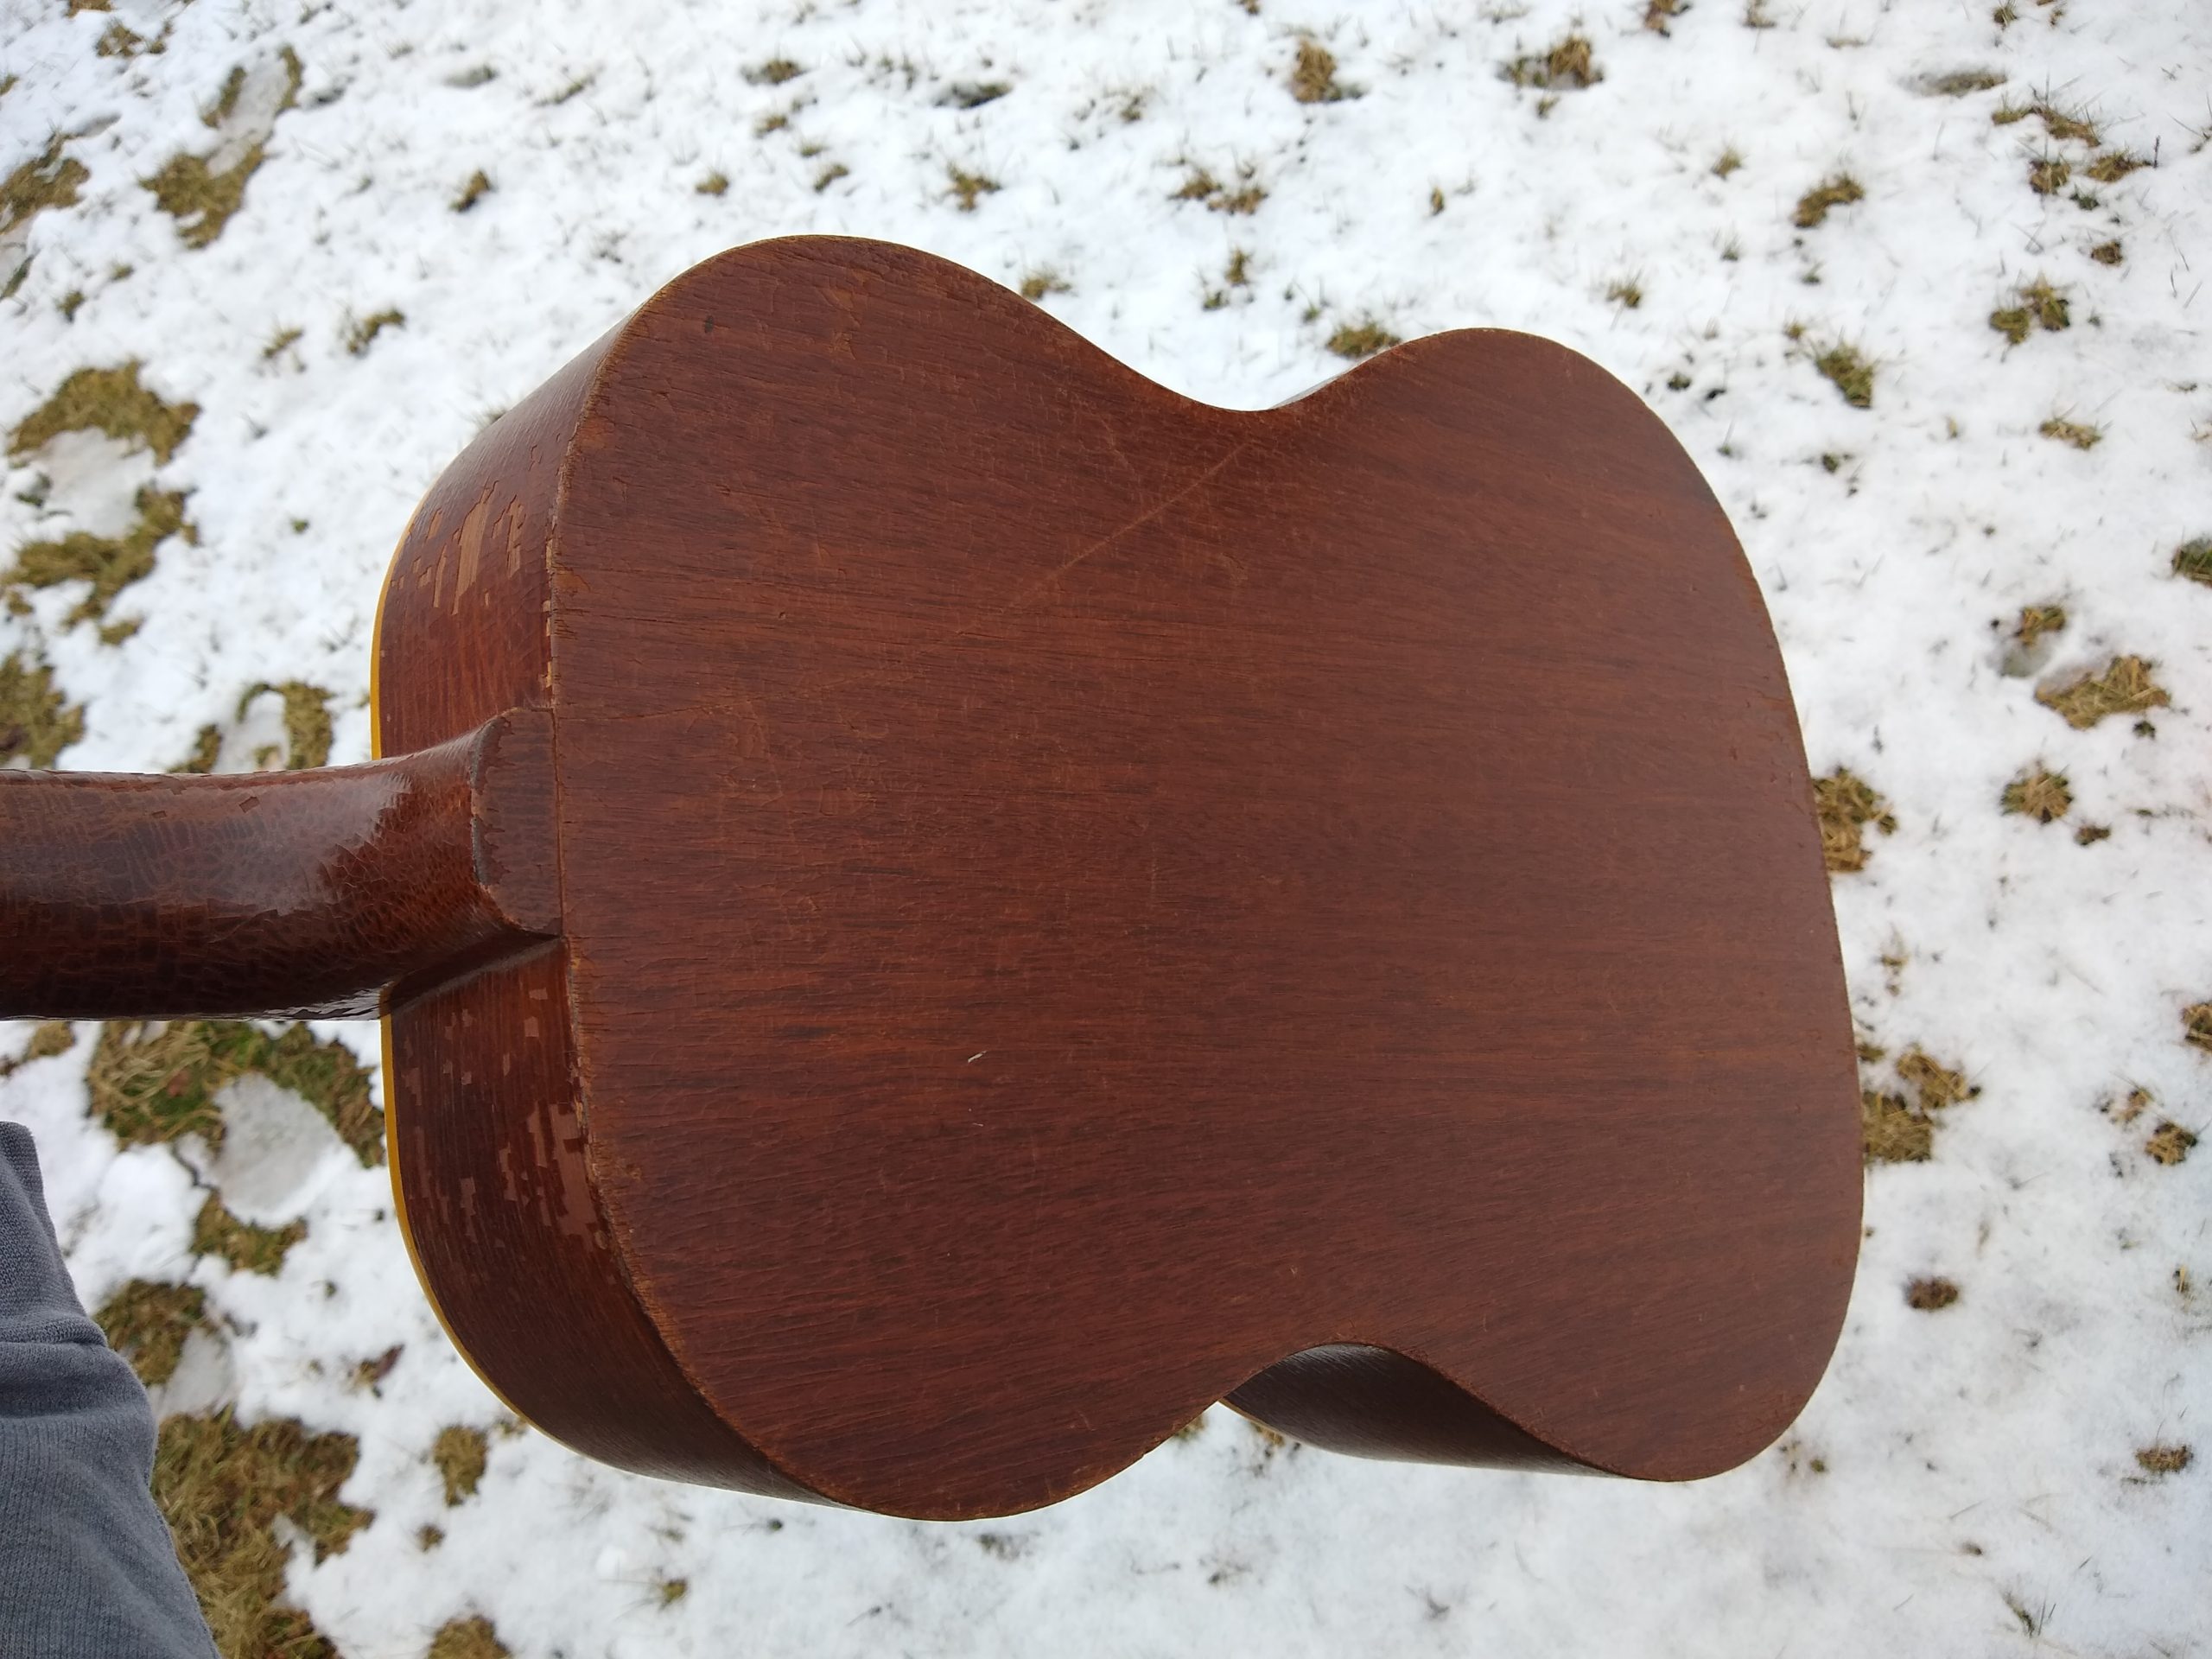
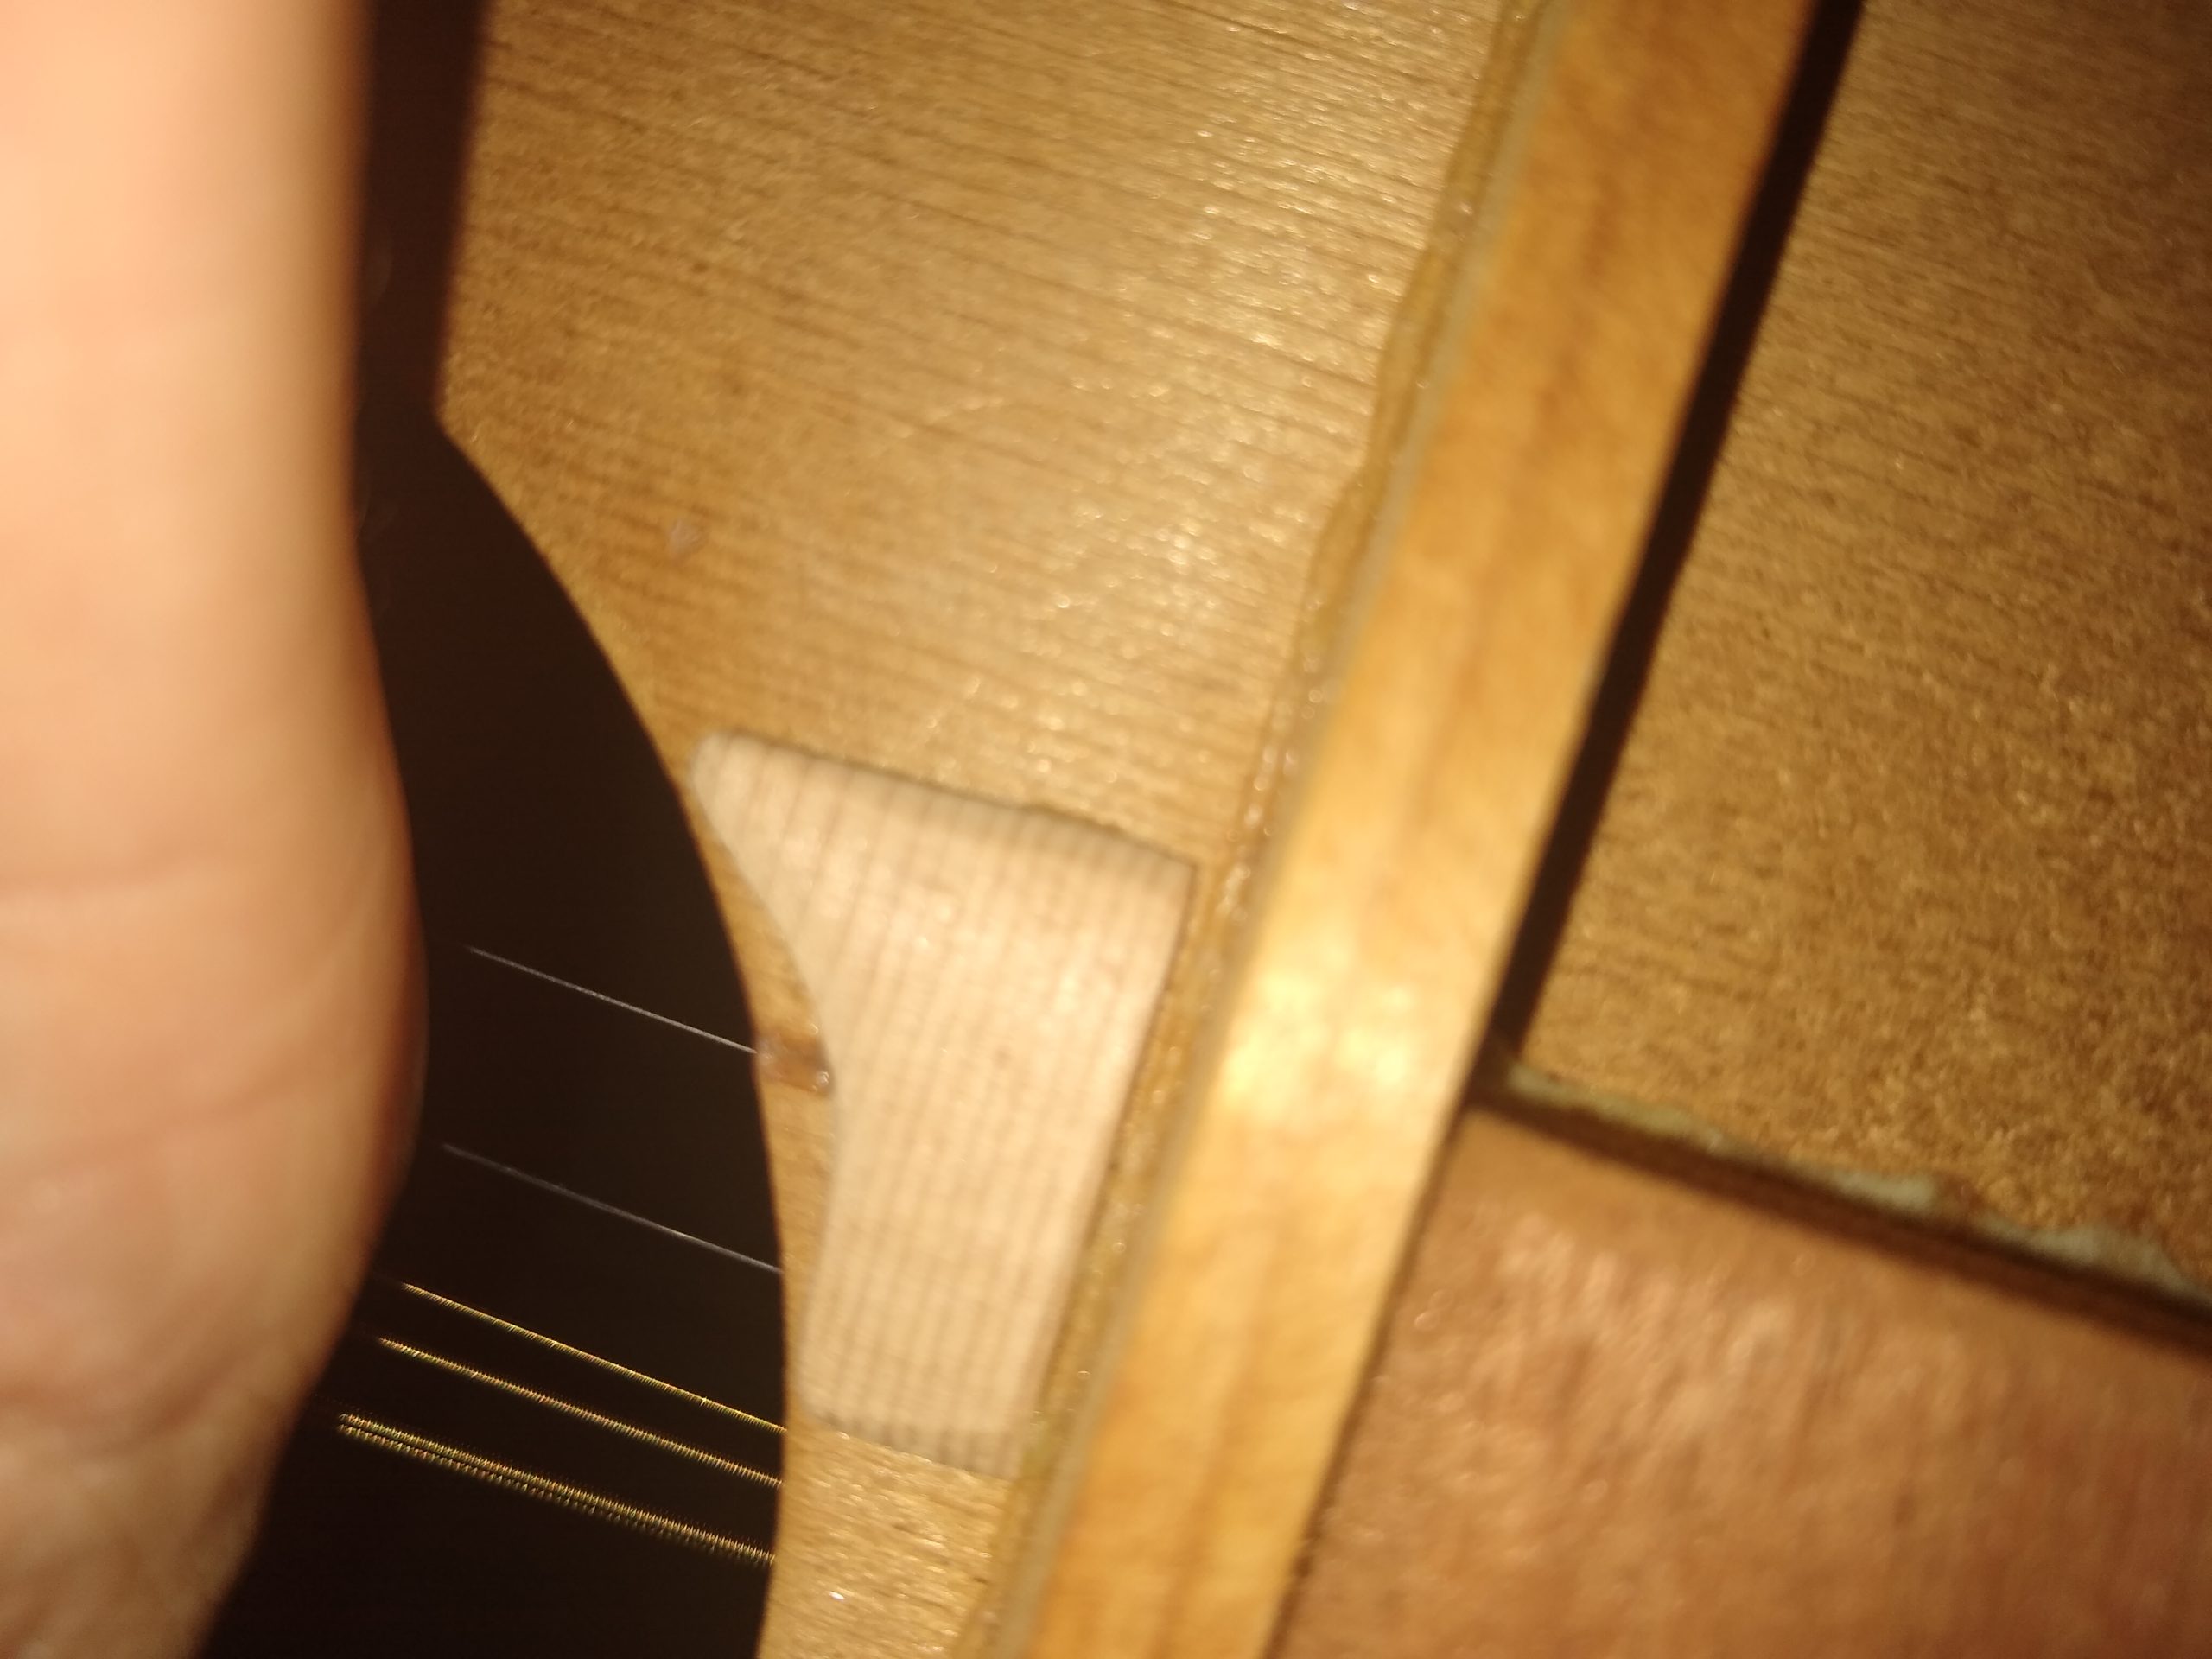
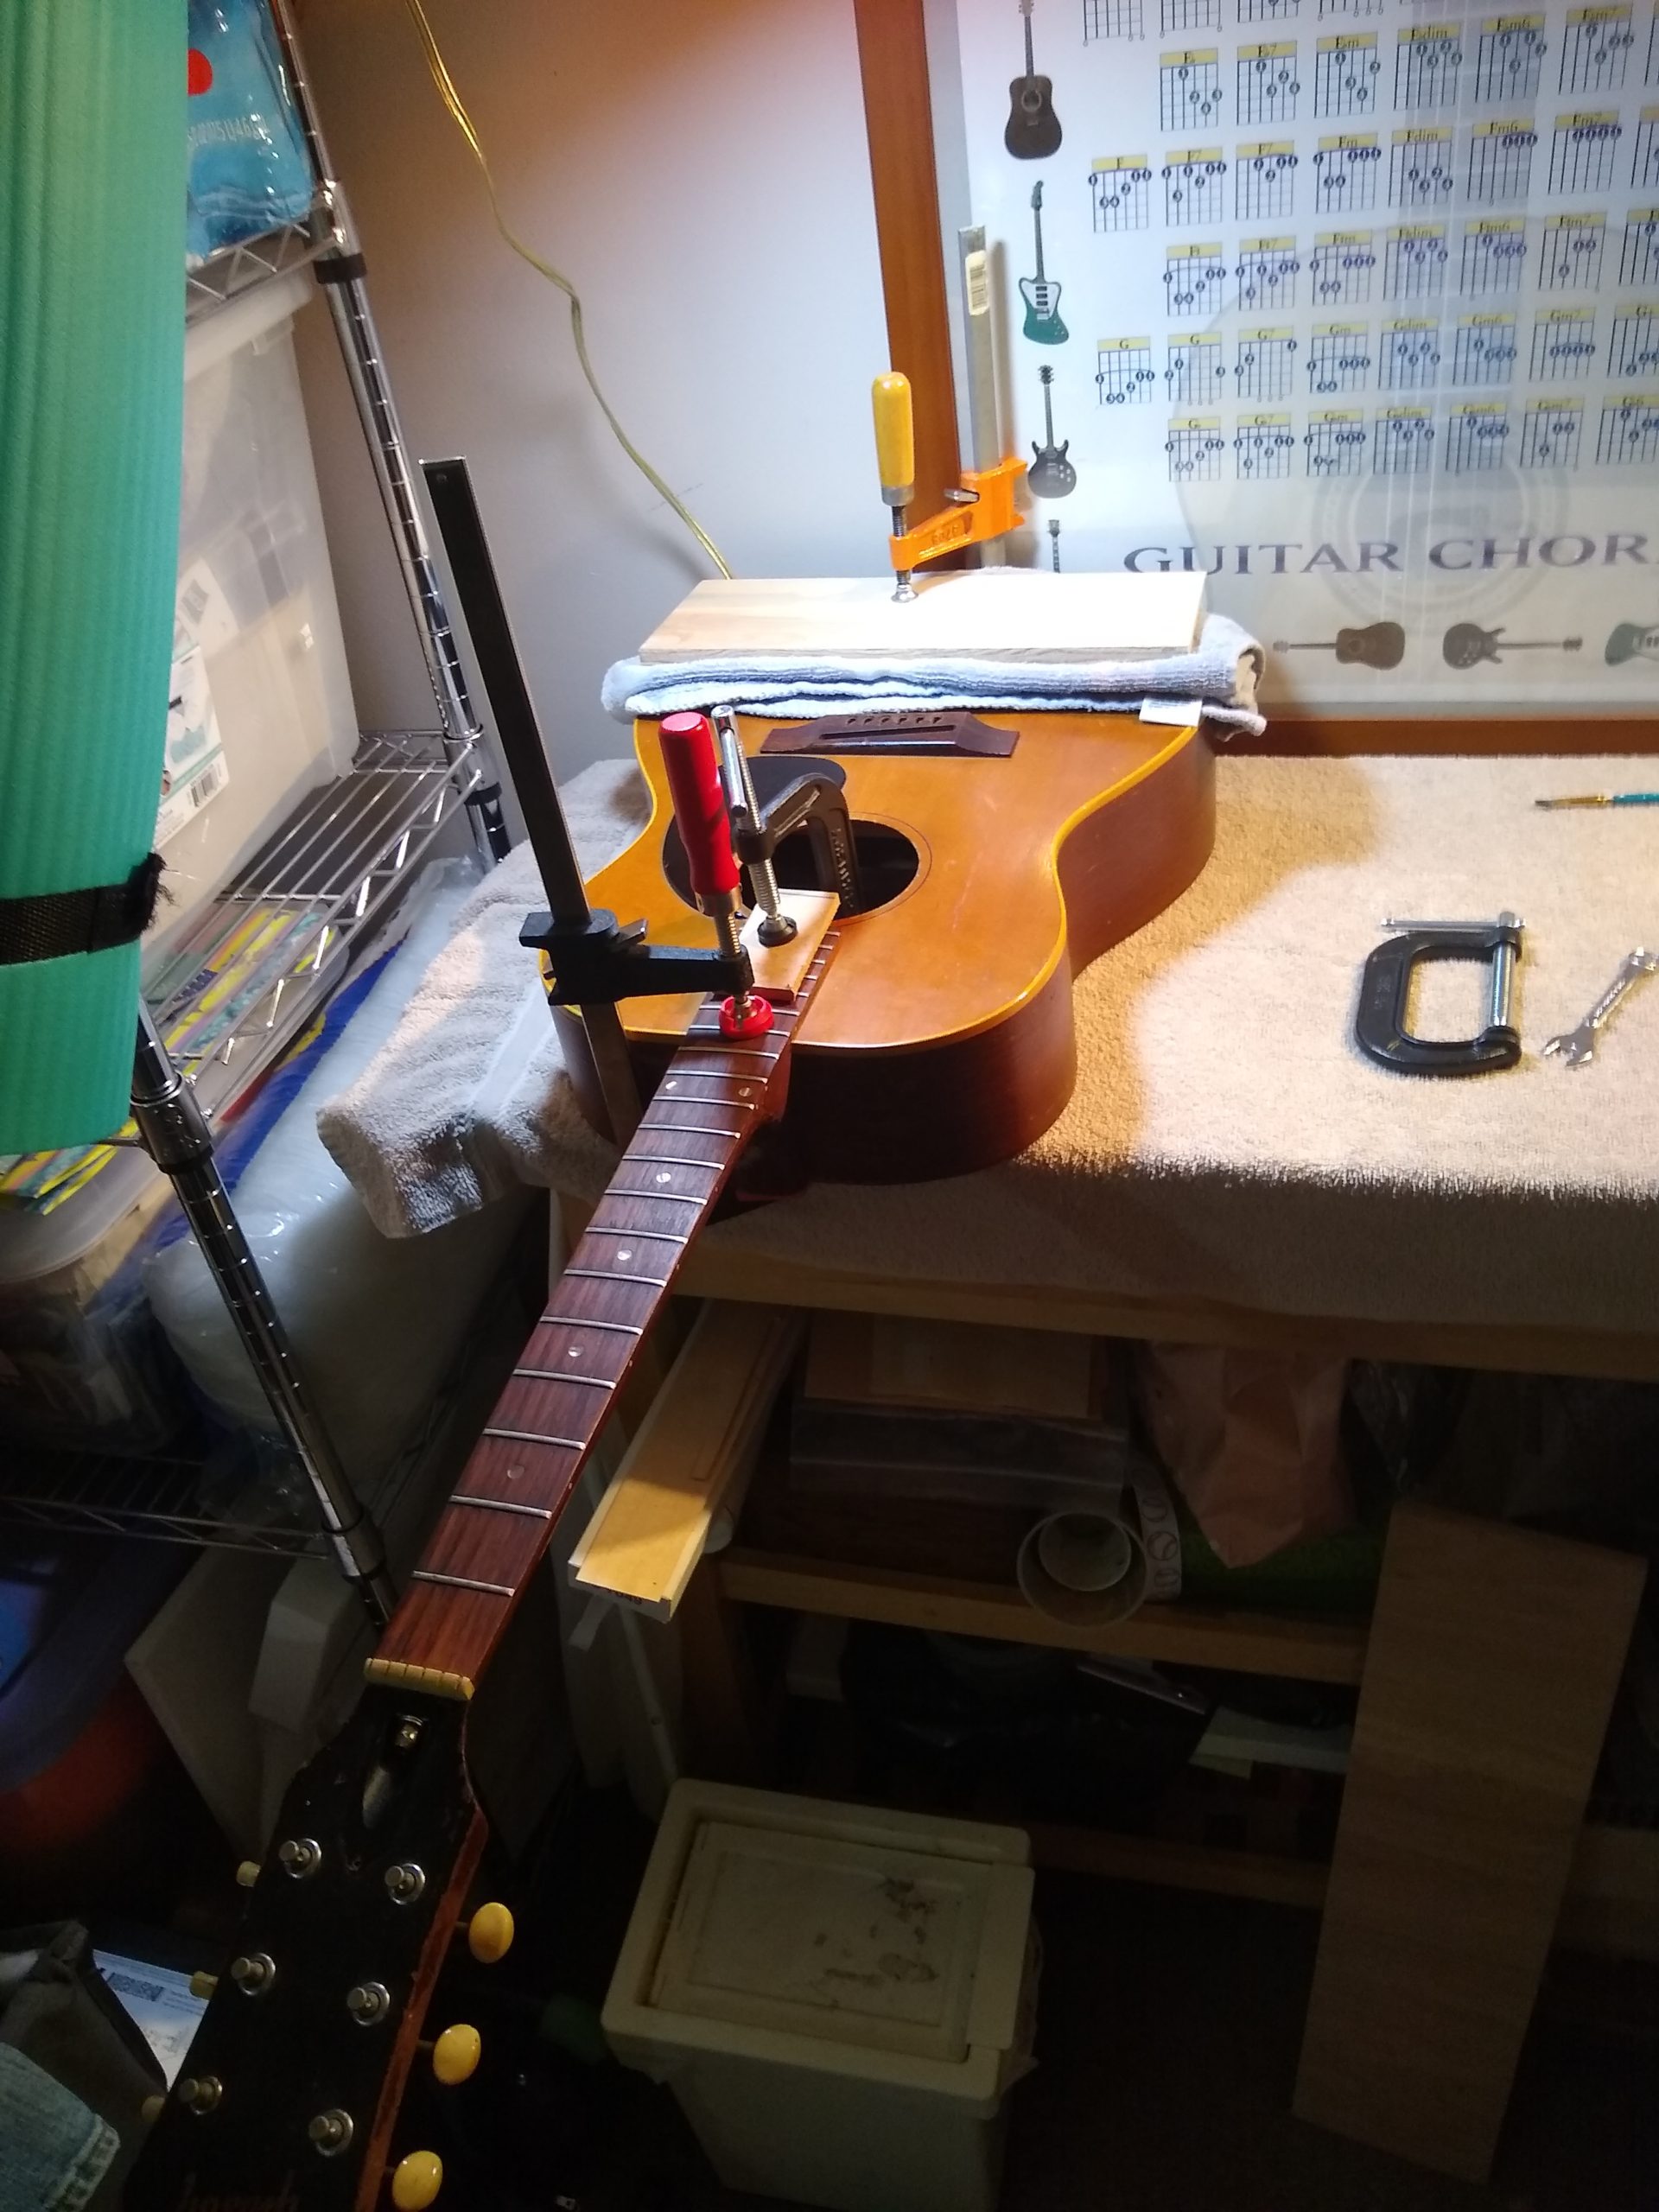
Resetting the neck was by far the most challenging affair. First I had to separate the fretboard extension from the top. I did this by heating it with two 100 watt light bulbs (shielding the rest of the top with foil), and slowly getting under the extension with a pallet knife. I made a neck reset jig similar to those commercially available, and thankfully was able to remove the neck without having to steam the dovetail at all. I noticed the heel already moved slightly, so an hour in the jig under pressure was all it took to pop out. The challenging part was shaving the heel and shimming the dovetail just right so that the neck angle would be correct once the glue dried. I spent a lot of time reading about how to do this, and after making some novice mistakes I finally got it right. I used fish glue since it is easily reversible with moisture, in case the neck ever has to be reset again.
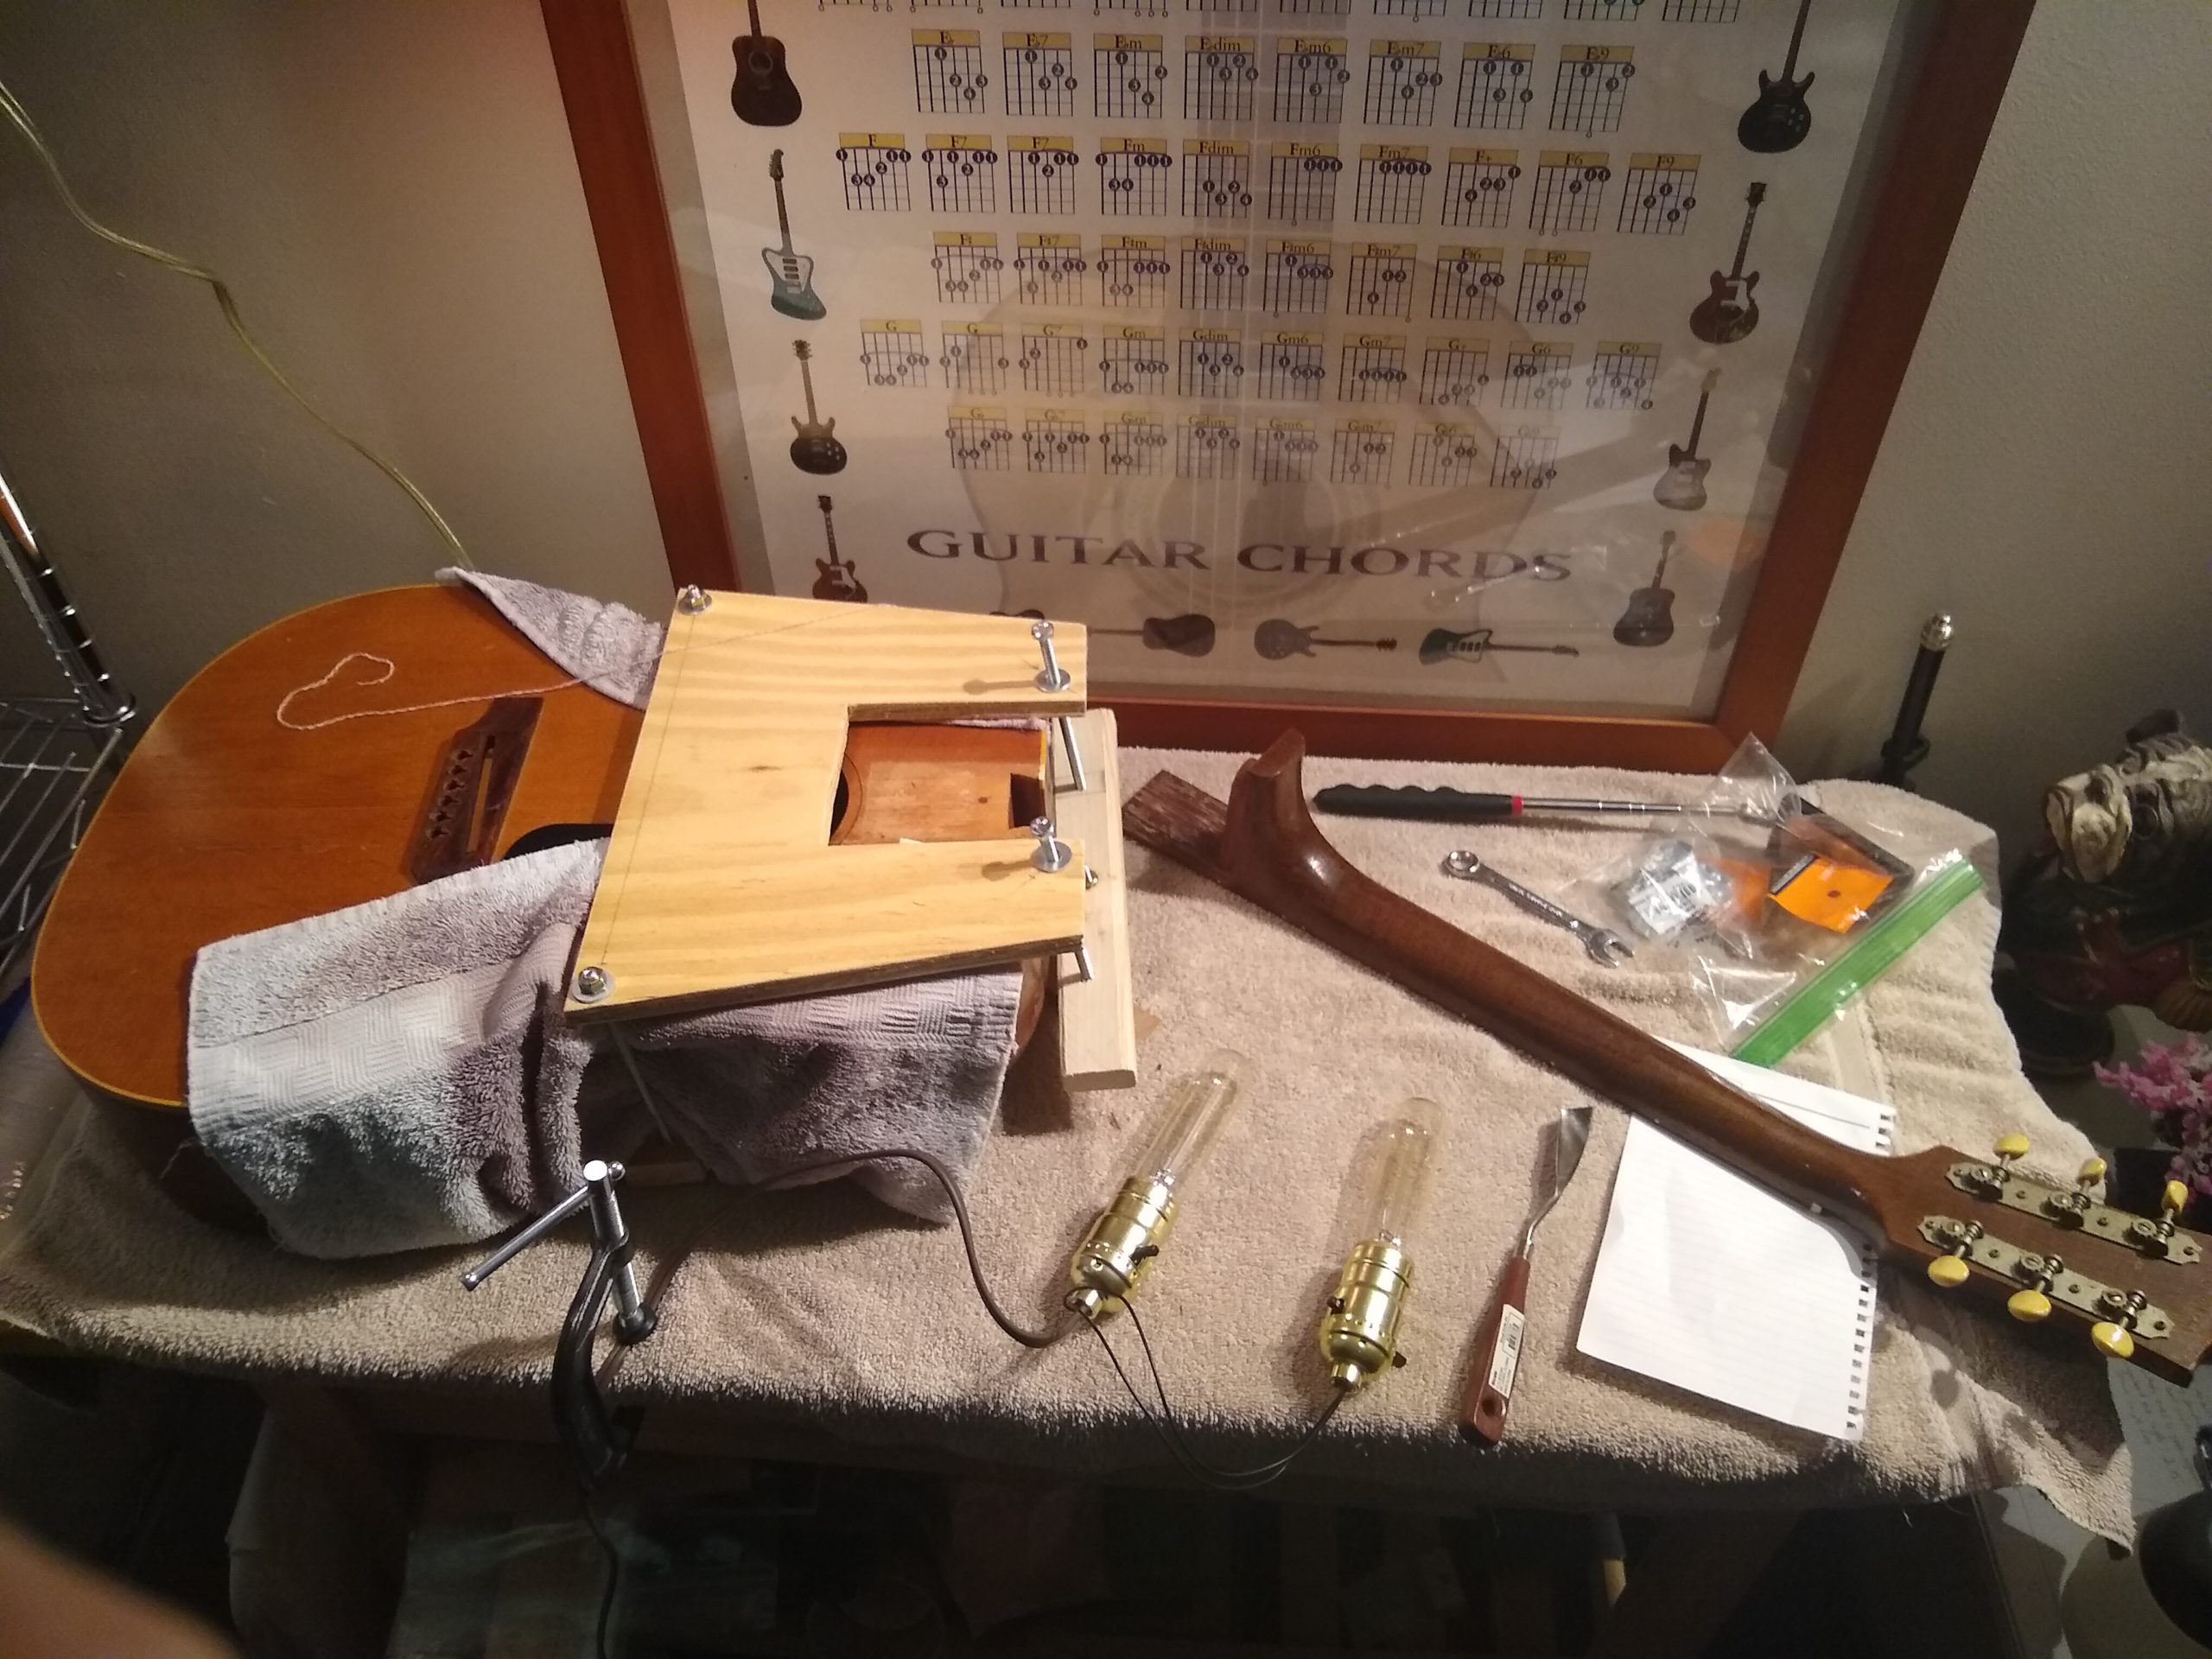
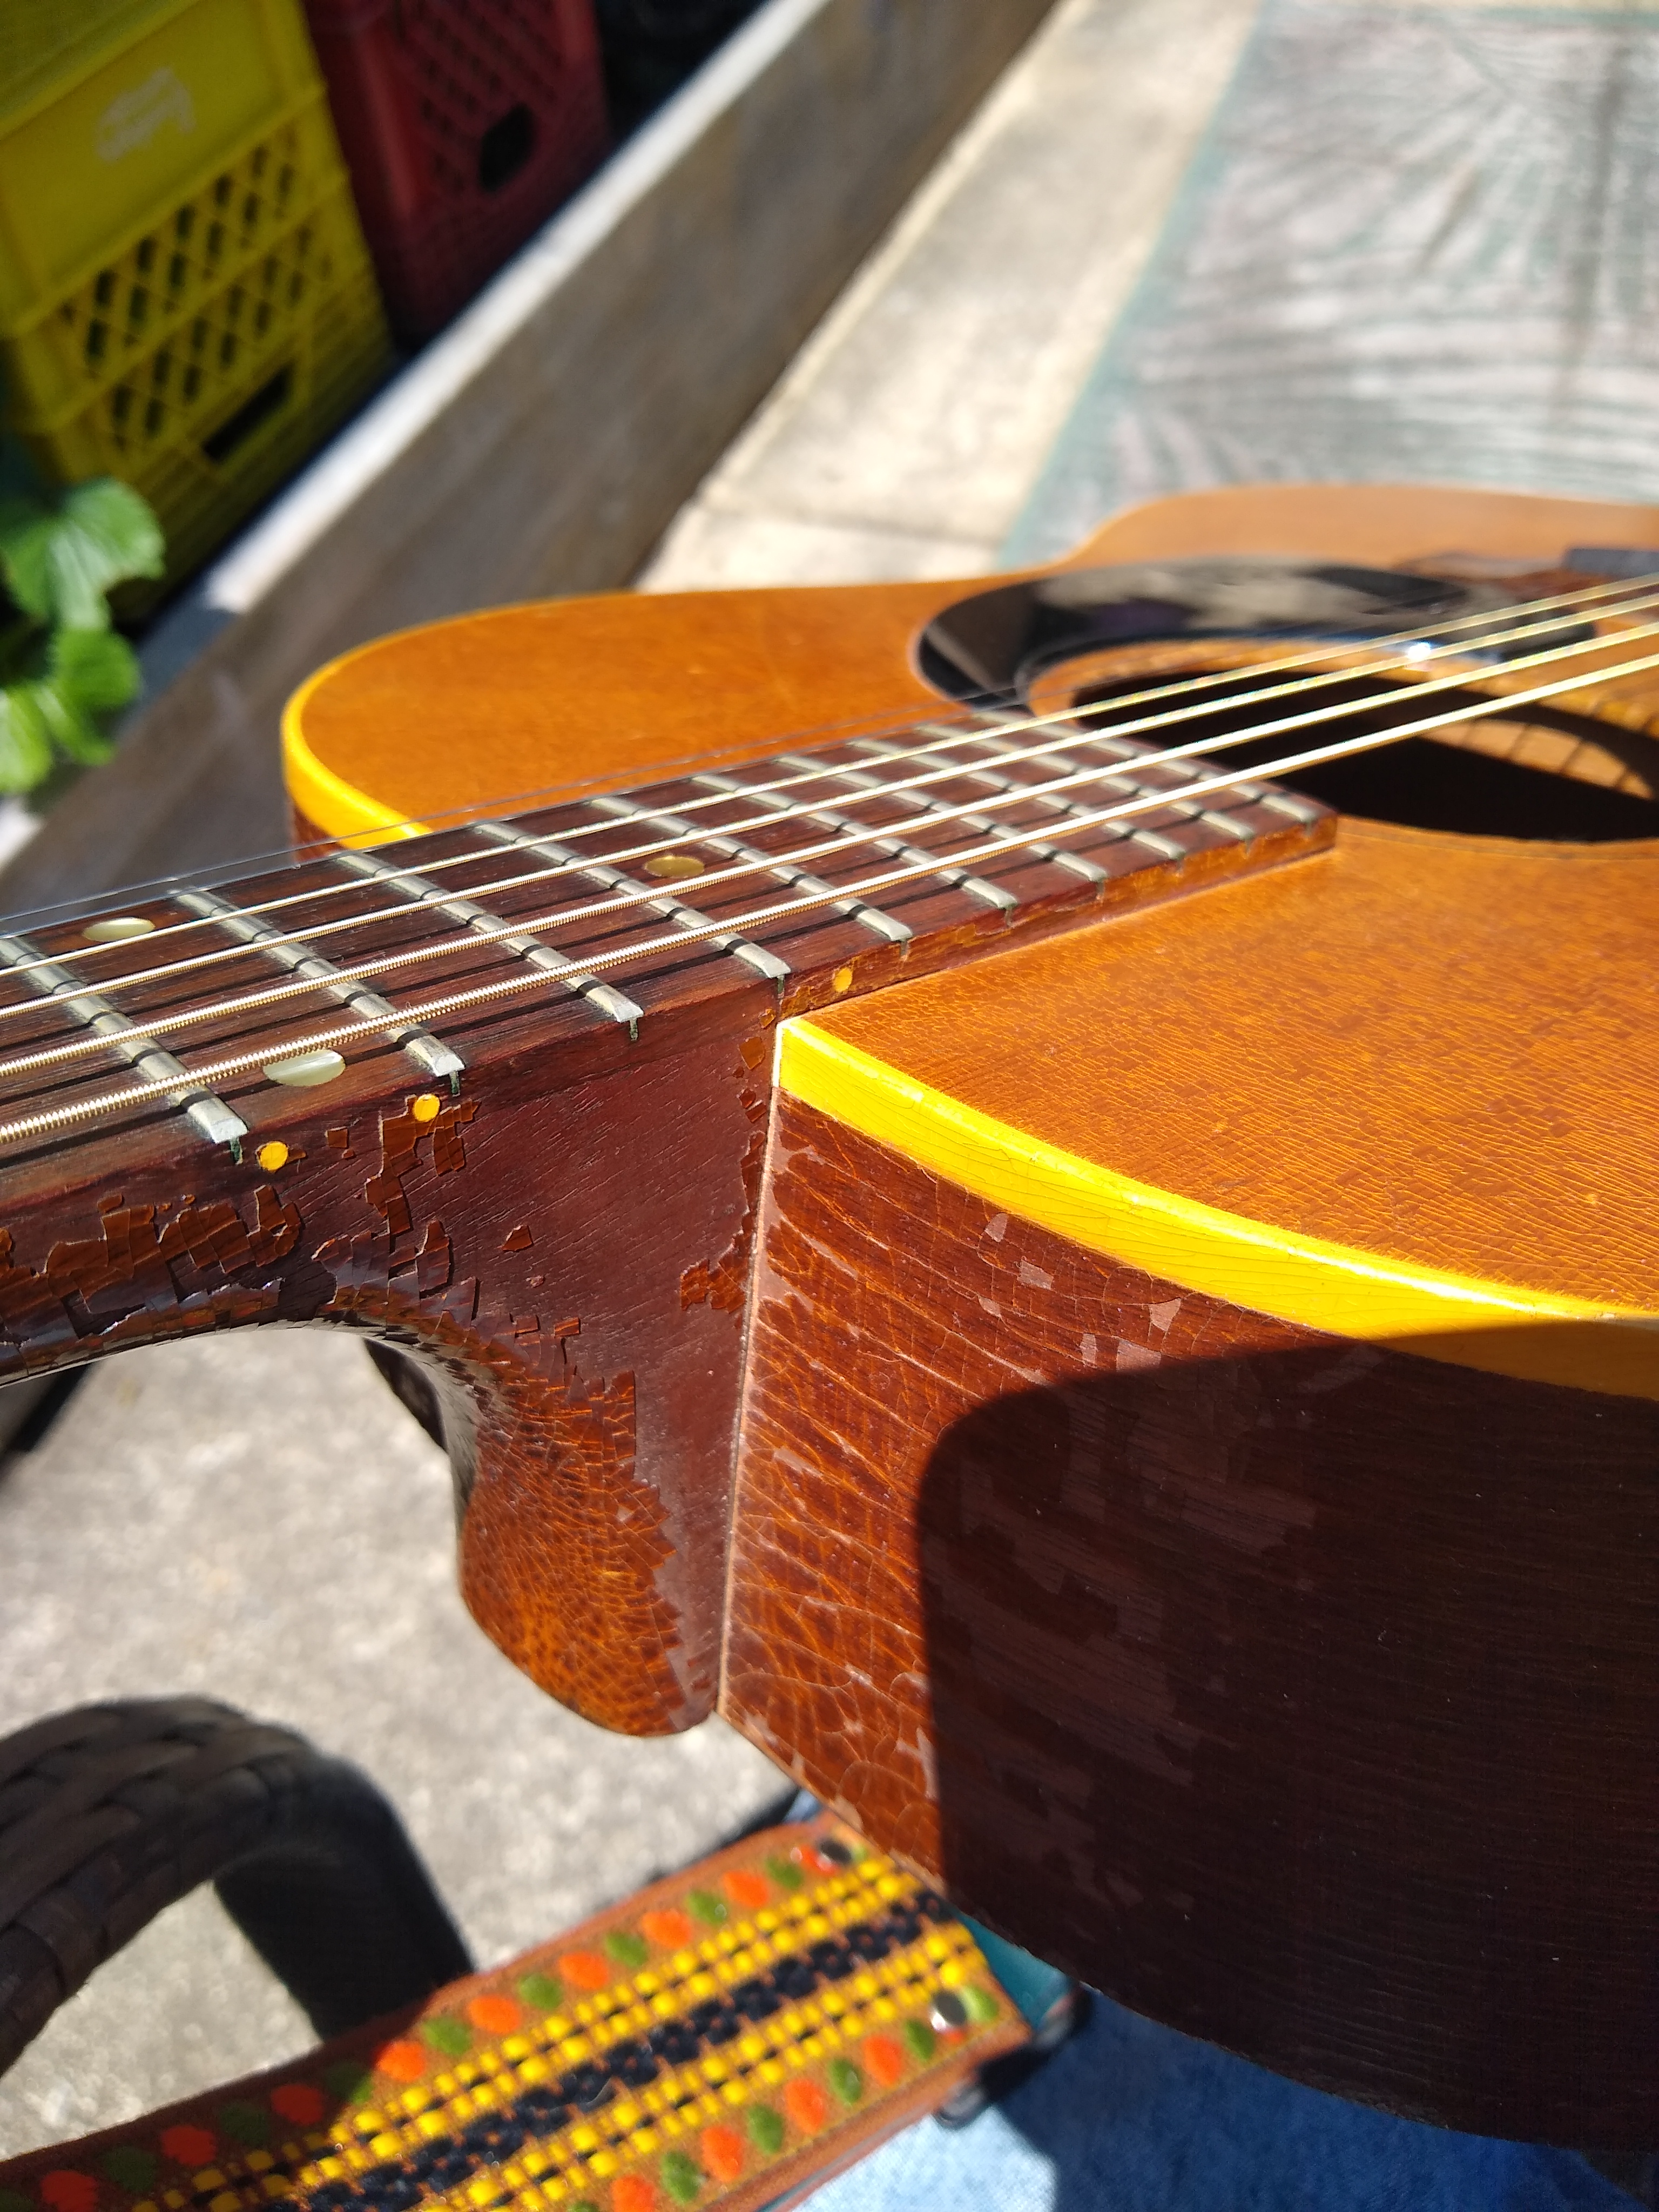
After cleaning up the fretboard, the final step to make it playable was making a proper saddle. The original saddle was an adjustable rosewood saddle with quite a bad reputation for sound, which makes sense since it’s only contact with the top is via the mounting screws. The “proper” luthier thing to do would be to plug the saddle slot and route a new slot for a more modern style saddle. I don’t have the tools to do this, so instead I made a saddle that fits the original 6.5mm slot out of ebony. This looks and sounds great if you ask me. I got some tuner ferrules that fit the original holes on Ebay to replace the missing one, and it’s all done! With some new strings and some mineral oil on the tuner gears, it’s back to being a player fifty-four years after it was manufactured.
- https://www.guitar-list.com/gibson/acoustic-guitars/gibson-lg-0
Some references for those curious about how to do a neck reset:
- Neck Reset Explained: http://guitarcareplayingtips.com/tip97.html
- Neck Reset Formula: https://www.liutaiomottola.com/formulae/Reset.htm
- Neck Reset Example Start to Finish: https://www.guitarspecialist.com/neck.htm

