Homebrew rackmount tube guitar preamp
I play guitar, and I have wanted a tube amplifier for quite some time. However tube amps are expensive and complete amp DIY builds can be tricky if it’s your first time. So I decided to do the next best thing by building a standalone preamp. This takes advantage of the fact that I already have several high-wattage solid state power amps, if you don’t mind the lack of an all-tube signal path.
The chassis is a standard 1U rackmount chassis that used to house some old broken television equipment. I dug it out of someones garage and figured it would be a great starting point for this project. The power transformer is and EDCOR XPWR024-120 supplying 350V @ 60mA and 6.3V @ 2A. This is dropped down to the 250V DC that the tubes operate on by a two-diode center-tap rectifier. The design is based on the preamp section of the AX84 Hi-Octane amplifier, with some slight modifications I will note later.
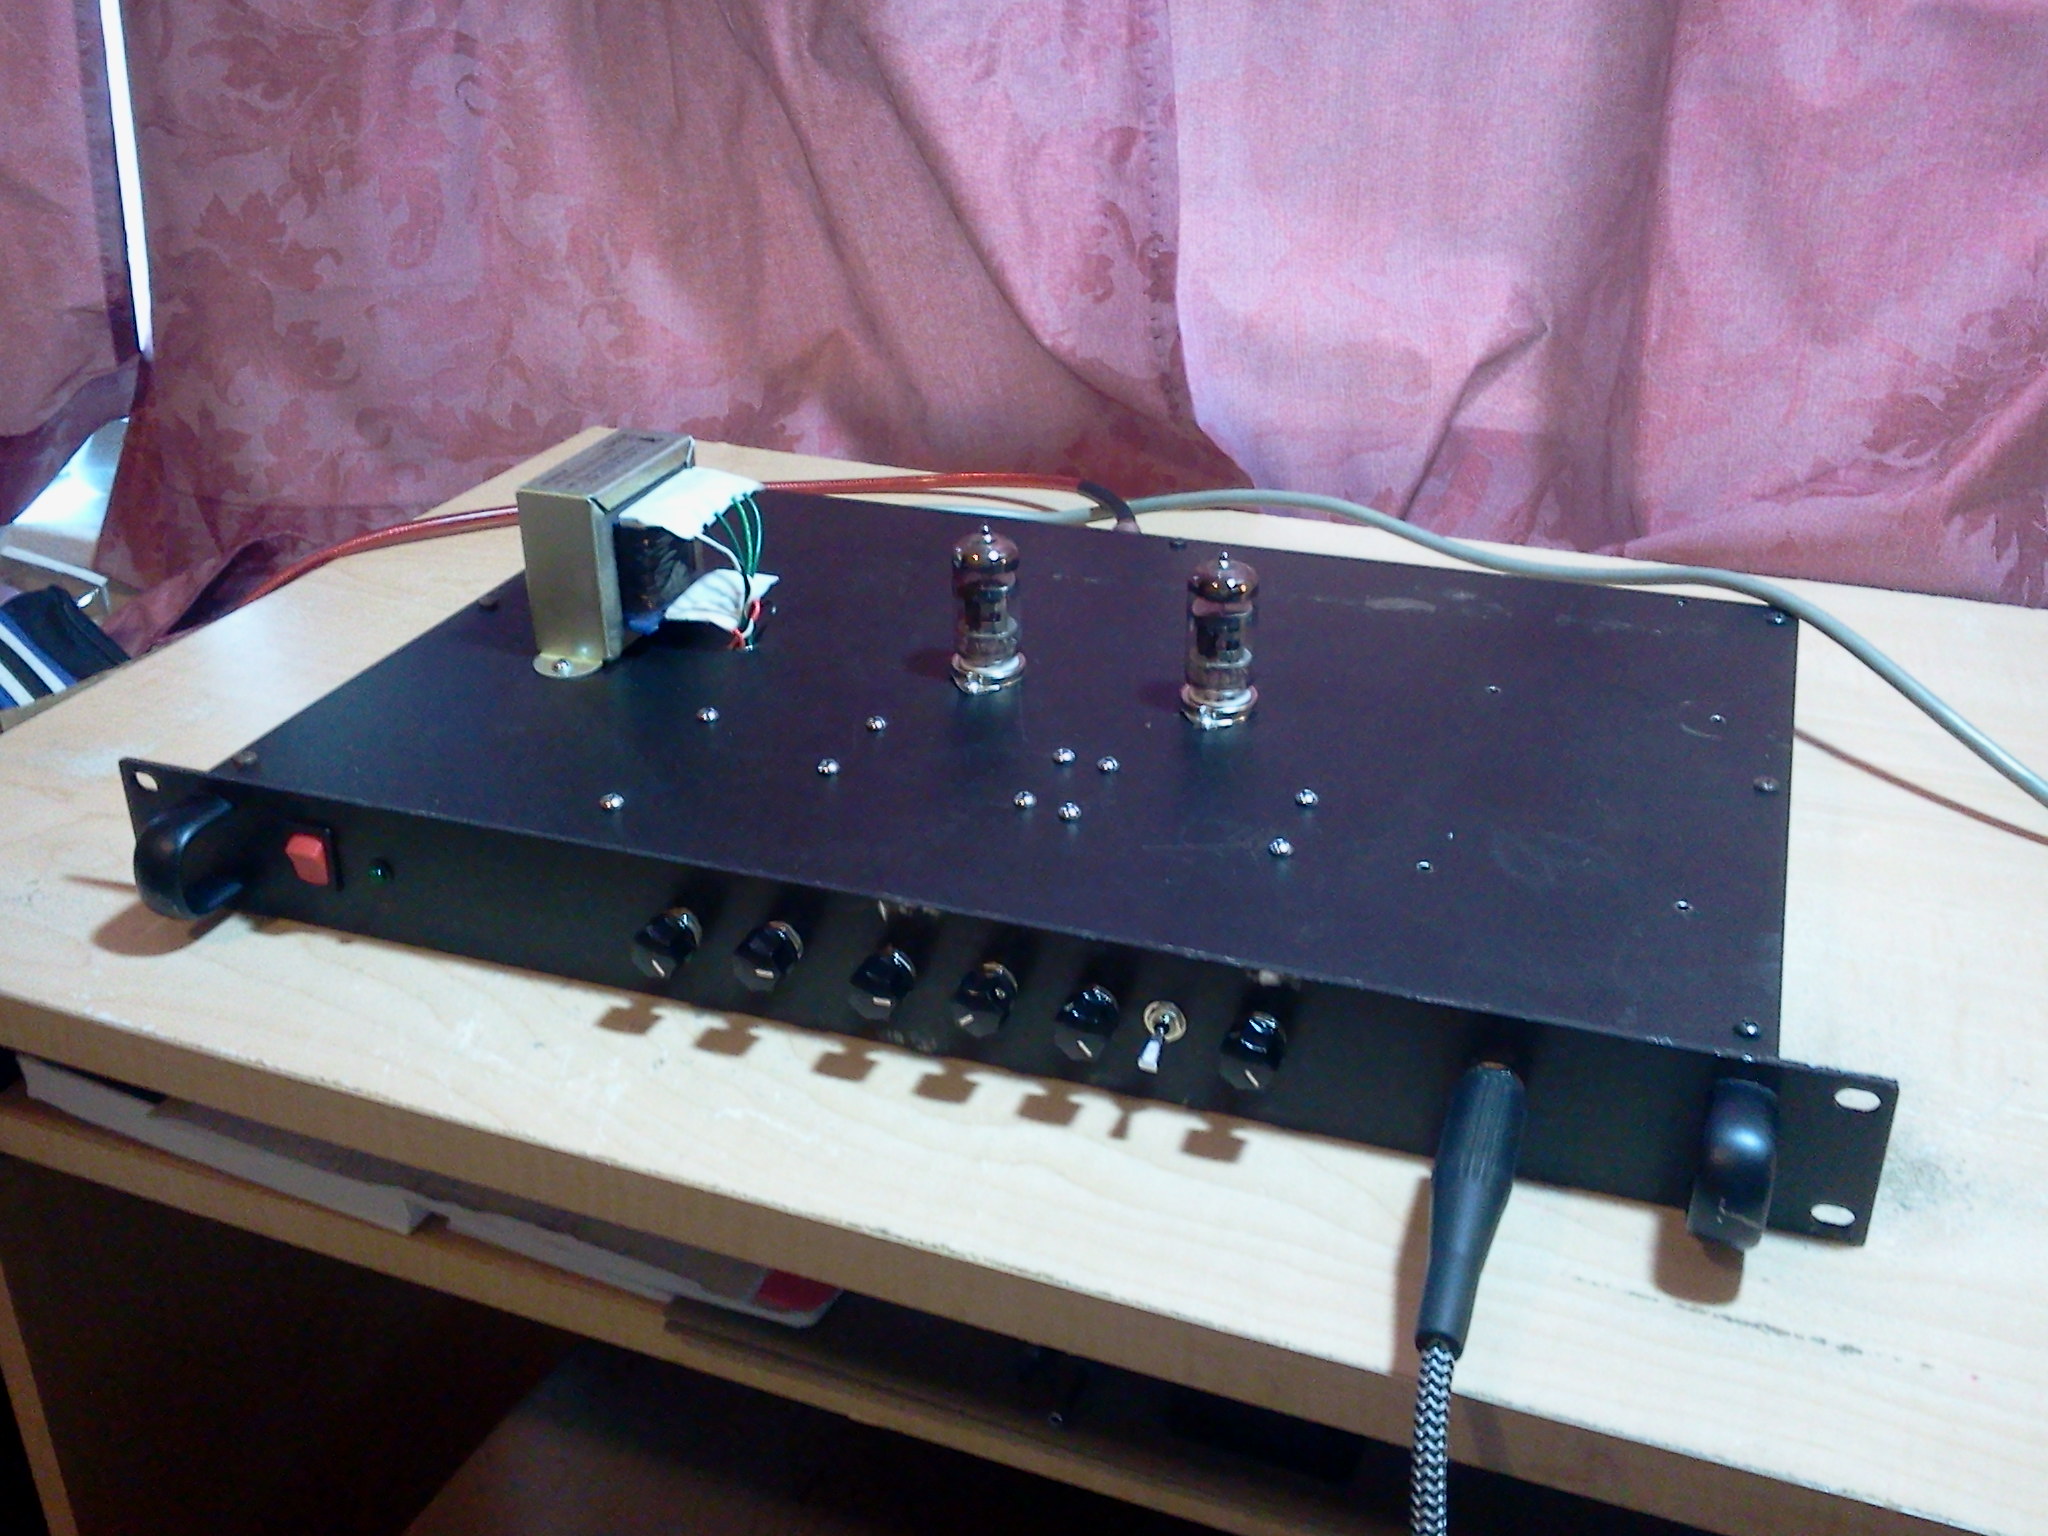
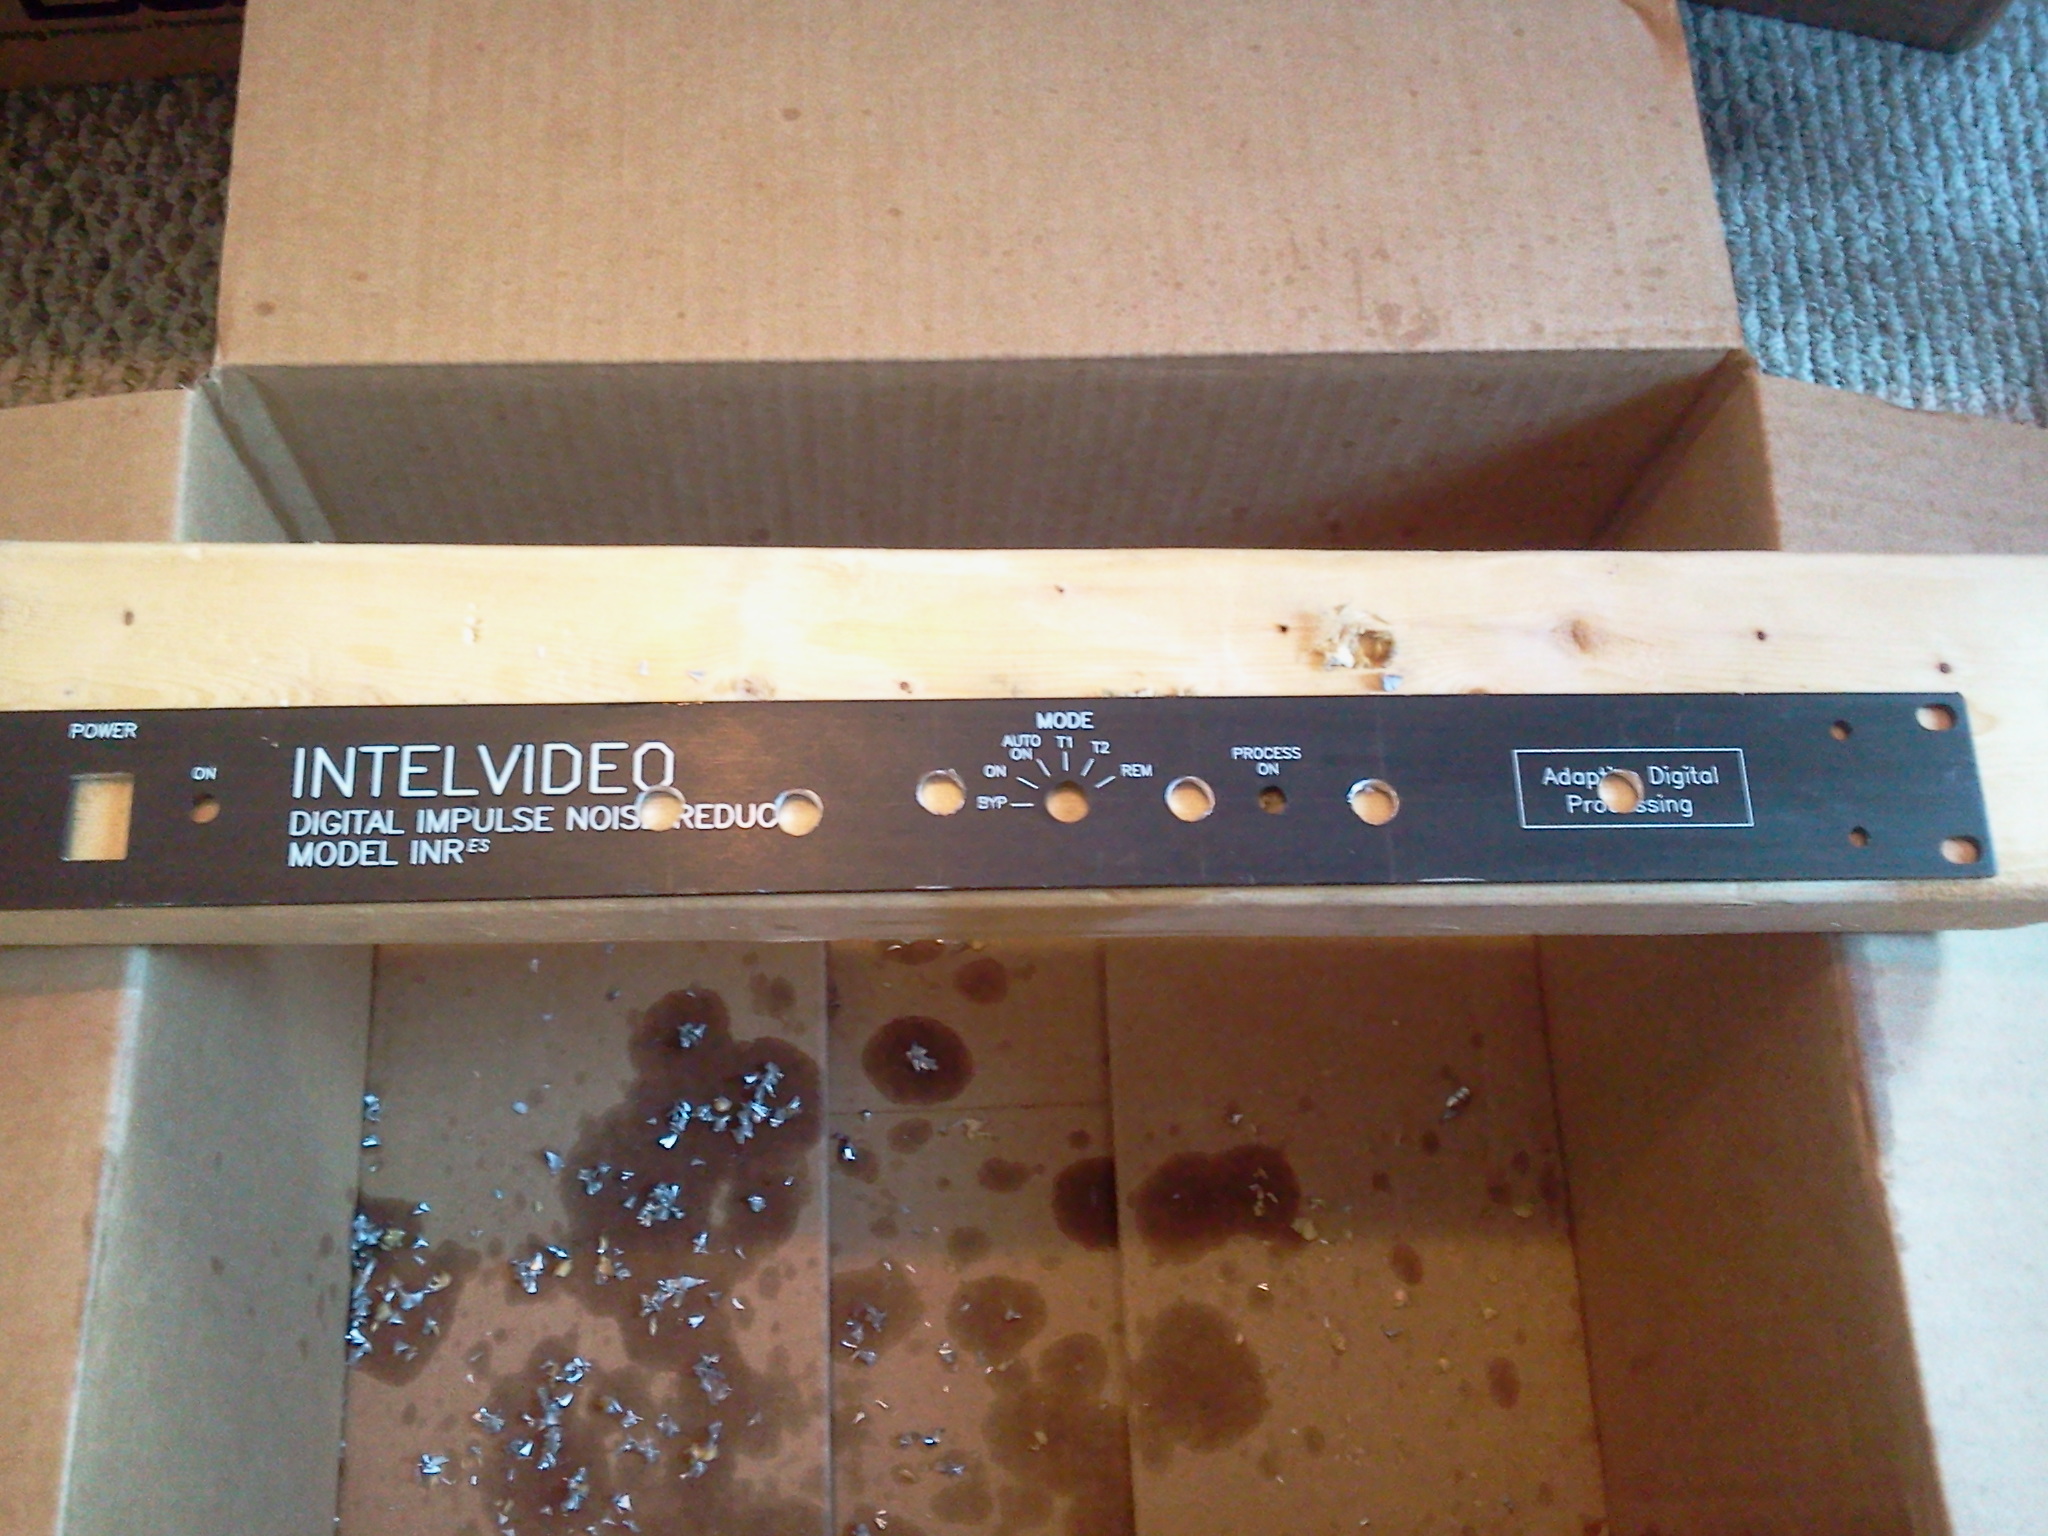
The control placements are rather non-standard, partially because this way was simpler to wire. I could’ve flipped the chassis and used the other side for a more usual layout, but I wanted to take advantage of the fact that there were numerous holes already drilled in one side from the previous components. Going from left to right the controls are: Power Switch, Mid, Bass, Treble, Master Volume, Gain 2, Bright Switch, Gain 1. In the end this preamp isn’t excellent for actual rackmount use since it takes up so much vertical space, but I didn’t want to hide away the tubes and lose that aesthetic.
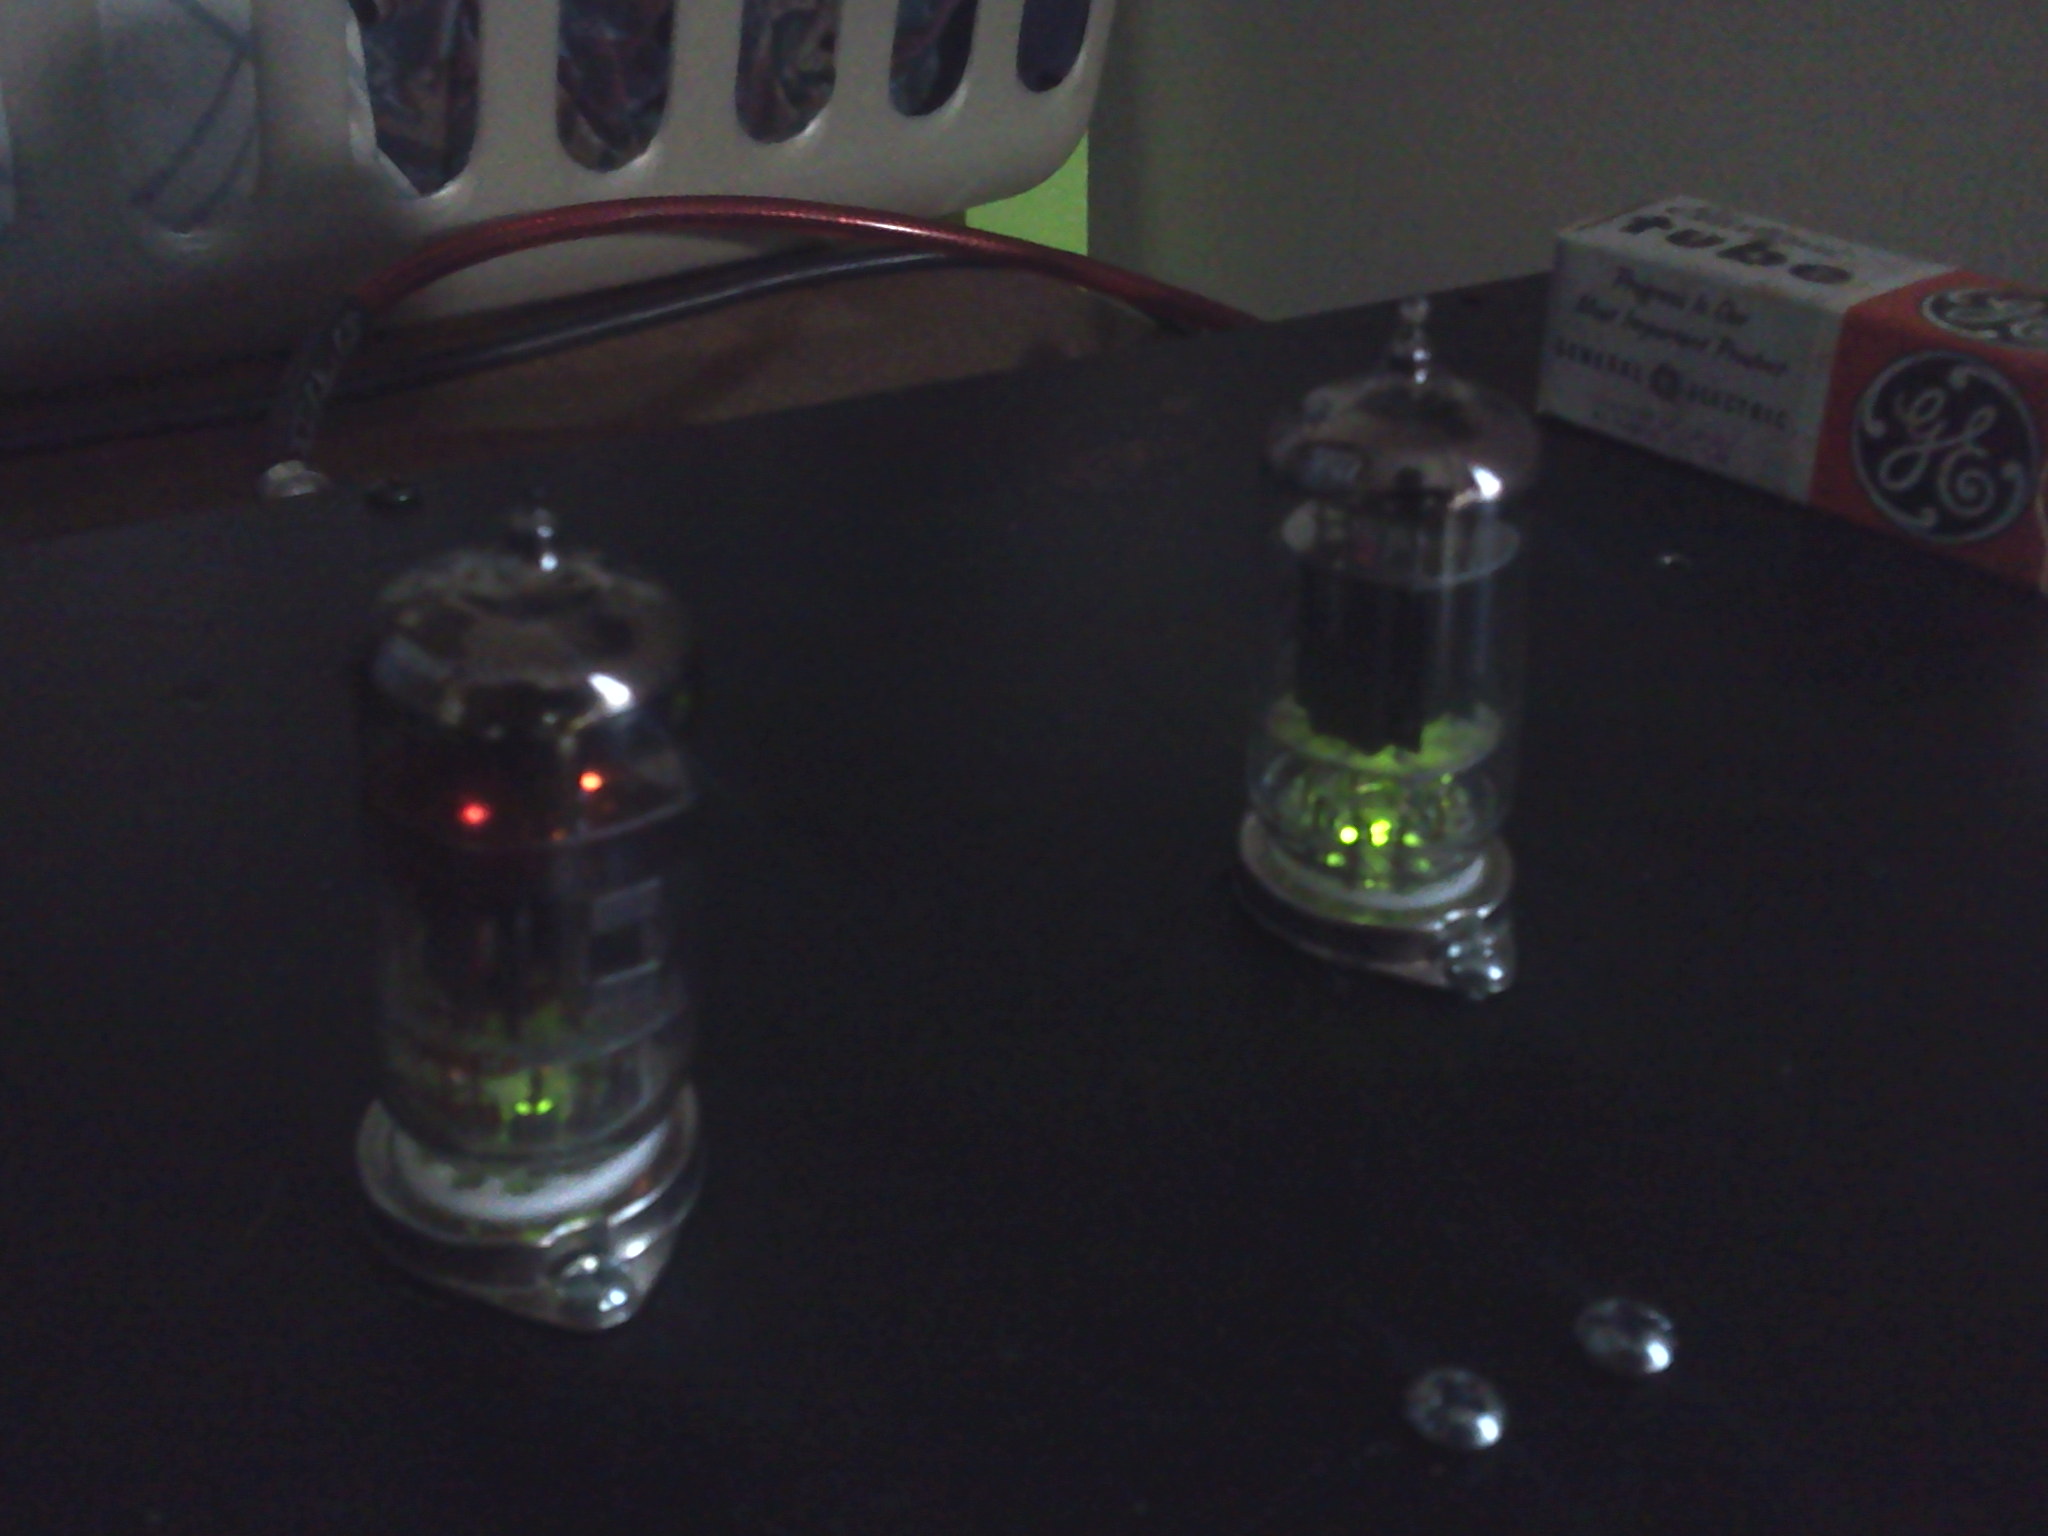
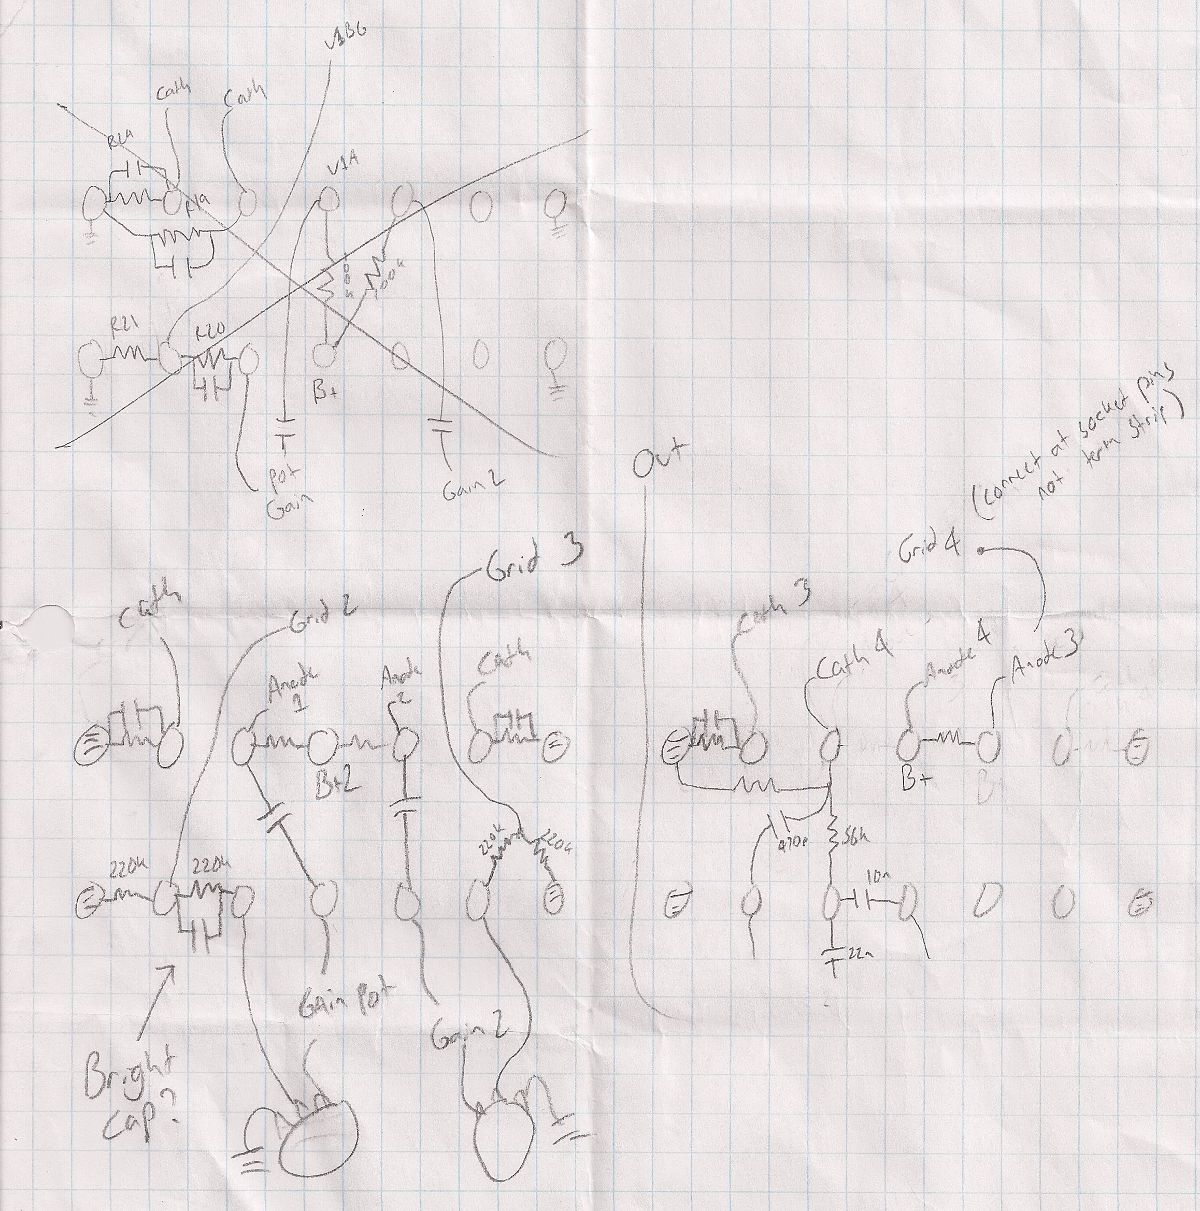
The schematic for my design is in the group below. It is very similar to the Hi-Octane preamp, with some changes that are improvements in my opinion. Changes include power supply filter cap draining resistors (for safety) and larger filter caps, the insertion of a bright switch, a slightly differently biased second gain stage, a tone cap across the input jack, and a slight change to the tone stack. You will also notice several LED’s powered by the filament winding. One of these is the power light, the other two are placed under the tubes. You can see the tubes with the under-lighting pictured below, as well as a shot of the preamp circuitry as a whole.
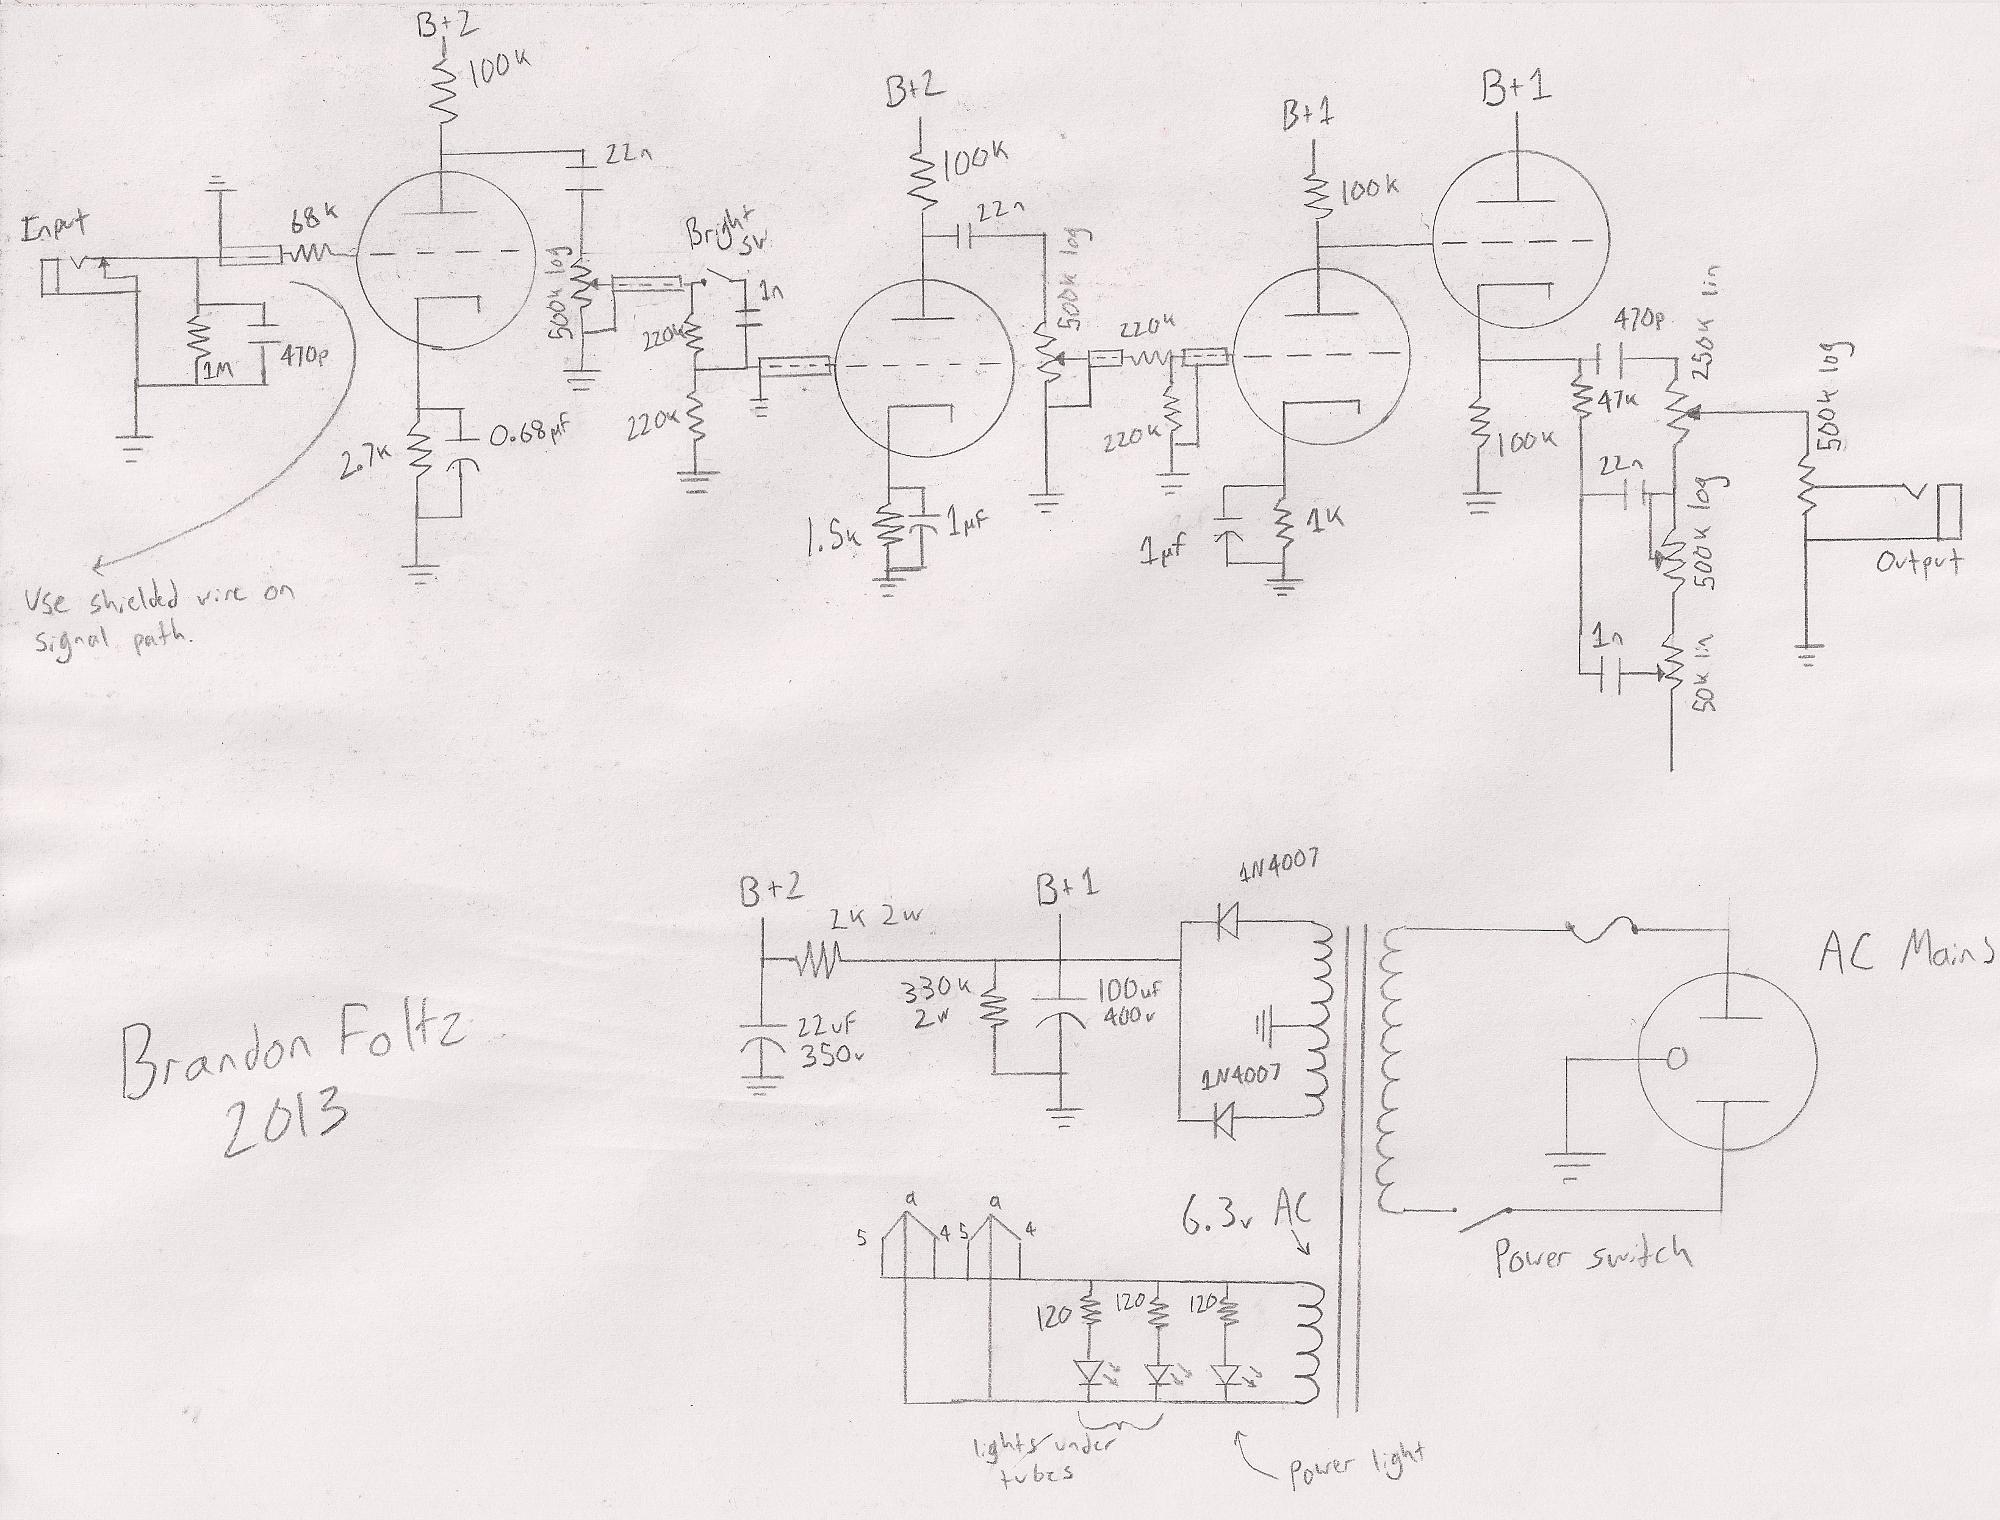
With the original Hi-Octane design, I found the amount of high-frequency grit unpleasant. The 470p cap across the 1M resistor on the input jack alleviates this and improves the sound greatly. The 1.5K cathode resistor on the second gain stage decreases gain slightly but results in a clearer, more well defined sound when driven. The 1n cap connected to the bright switch exists in the Hi-Octane schematic, but it is not switched. I’ve found that I prefer to have the bright switch on when playing with a clean sound, and turn it off when playing with high distortion to cut out residual gritty treble sounds. The 1K cathode resistor on the third gain stage and 47K resistor in the tone stack were merely changes of convenience, I didn’t have the components the schematic requested on hand but these are adequate substitutes.
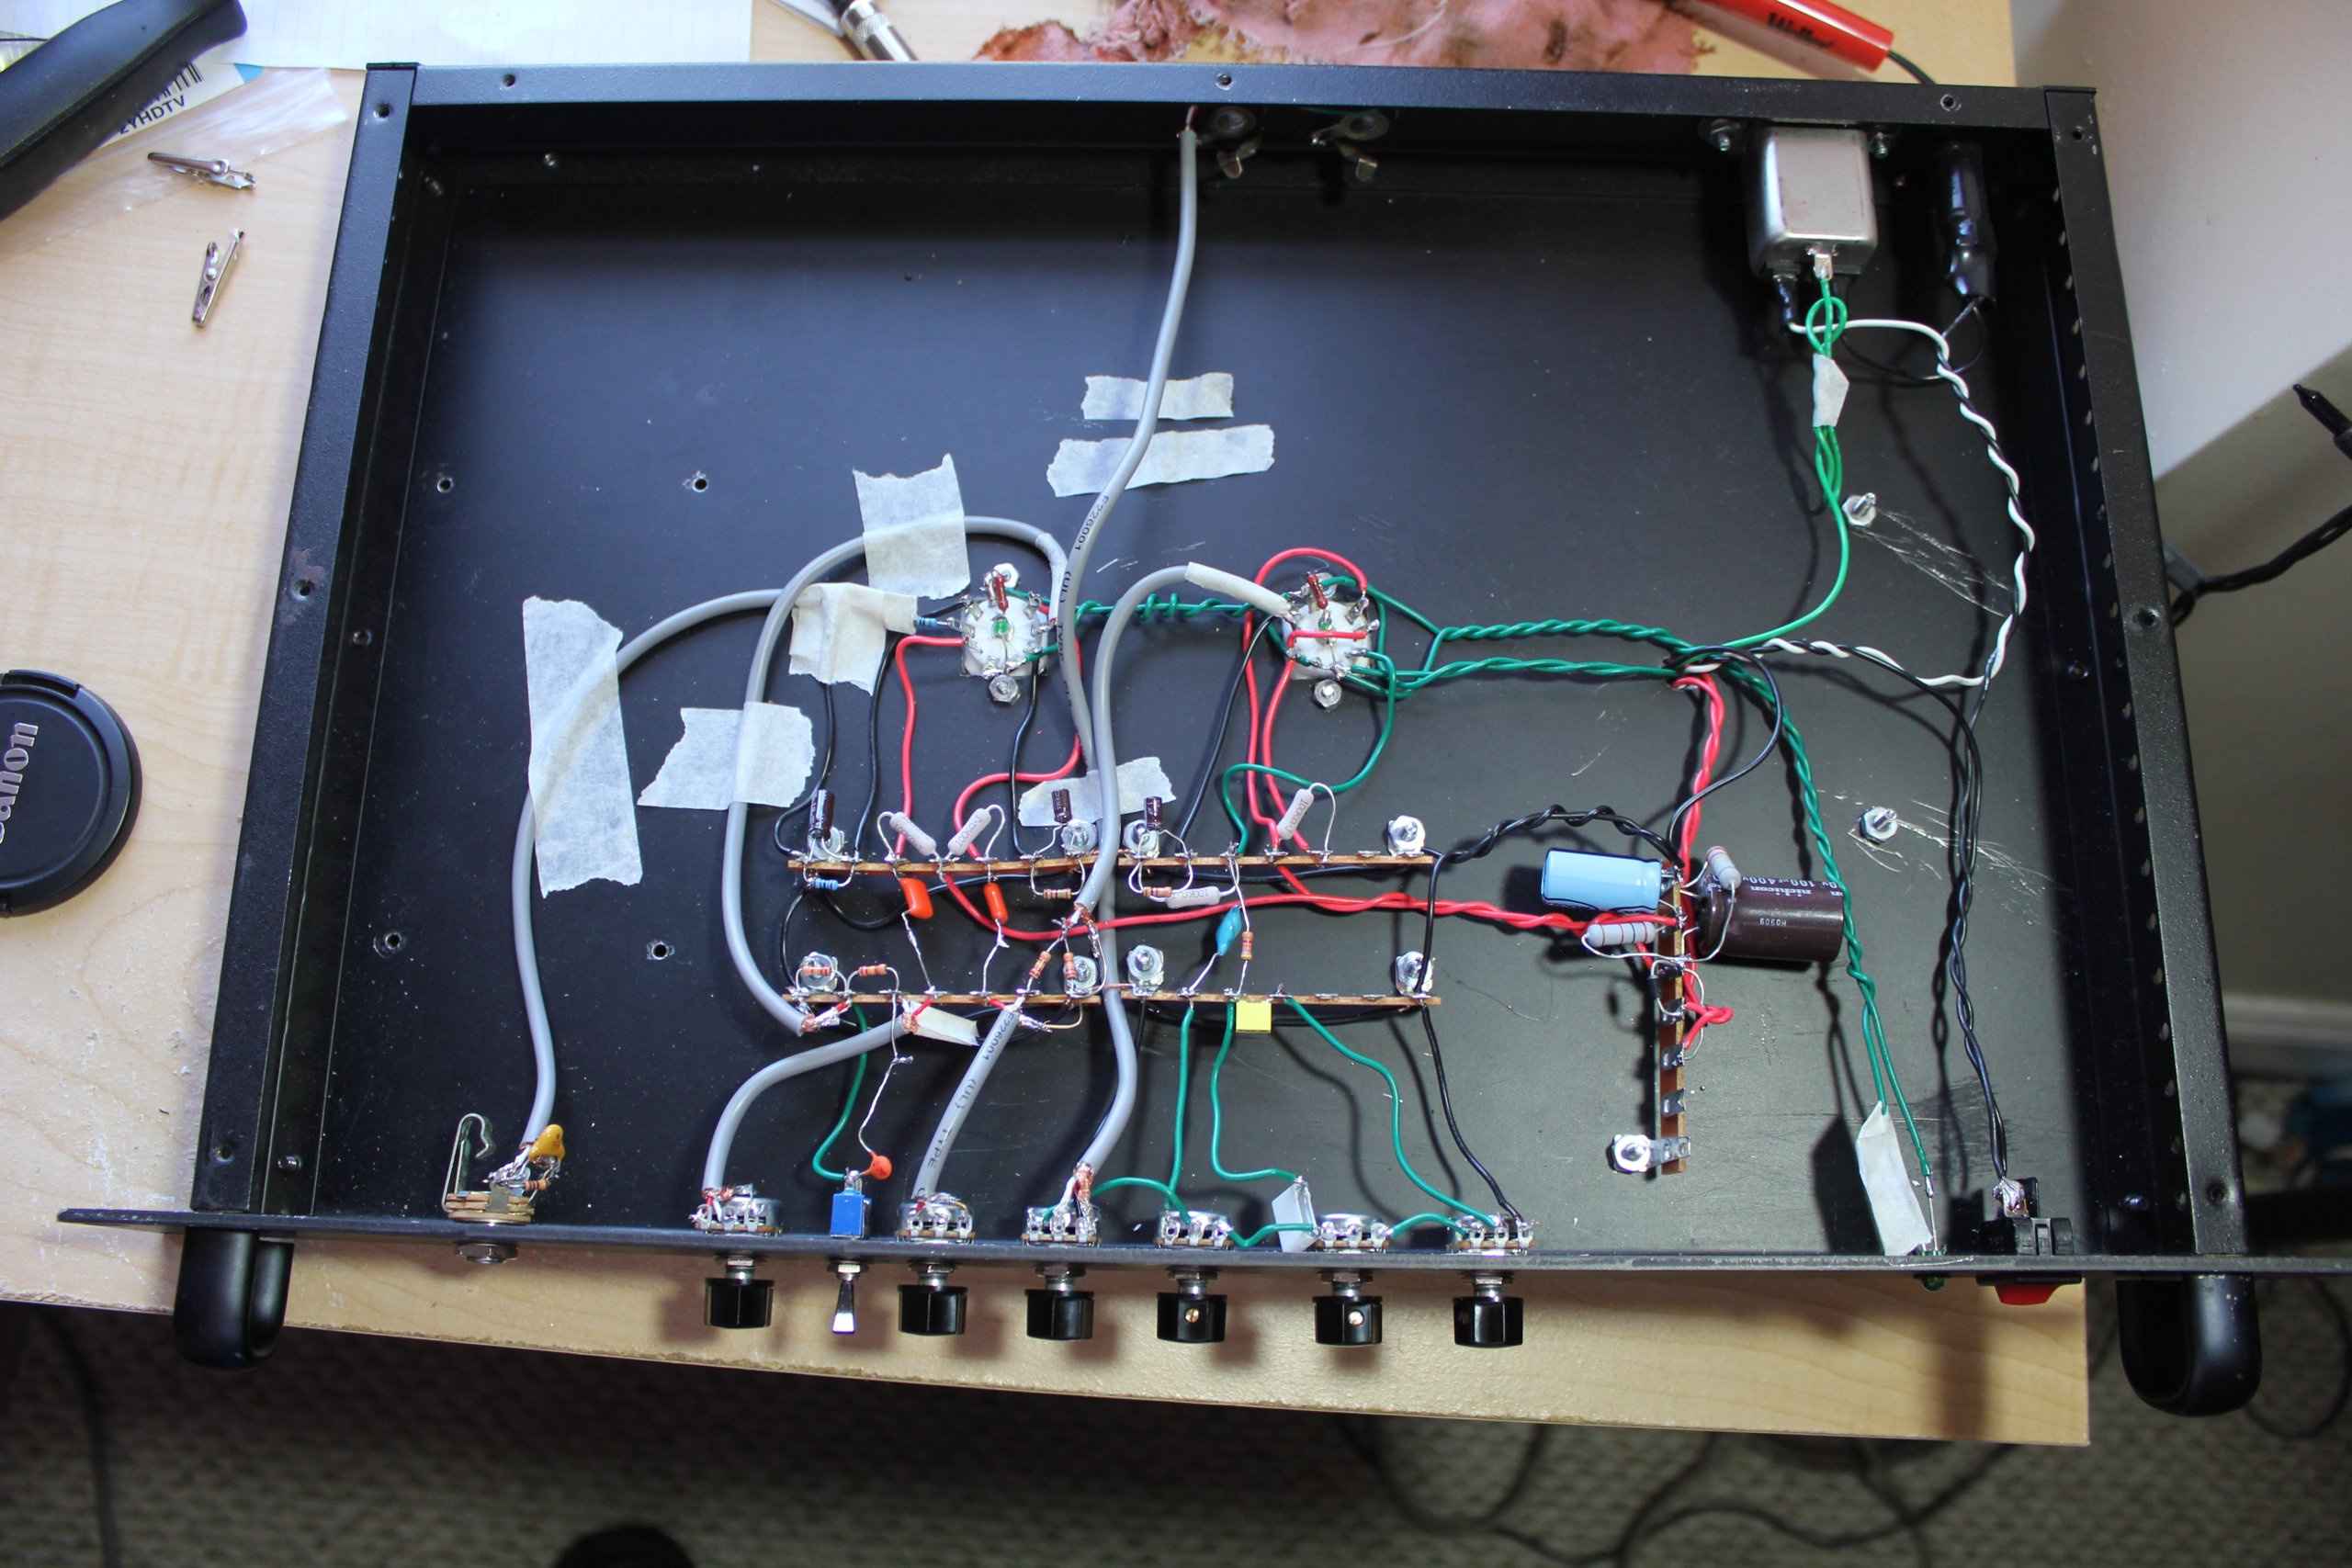
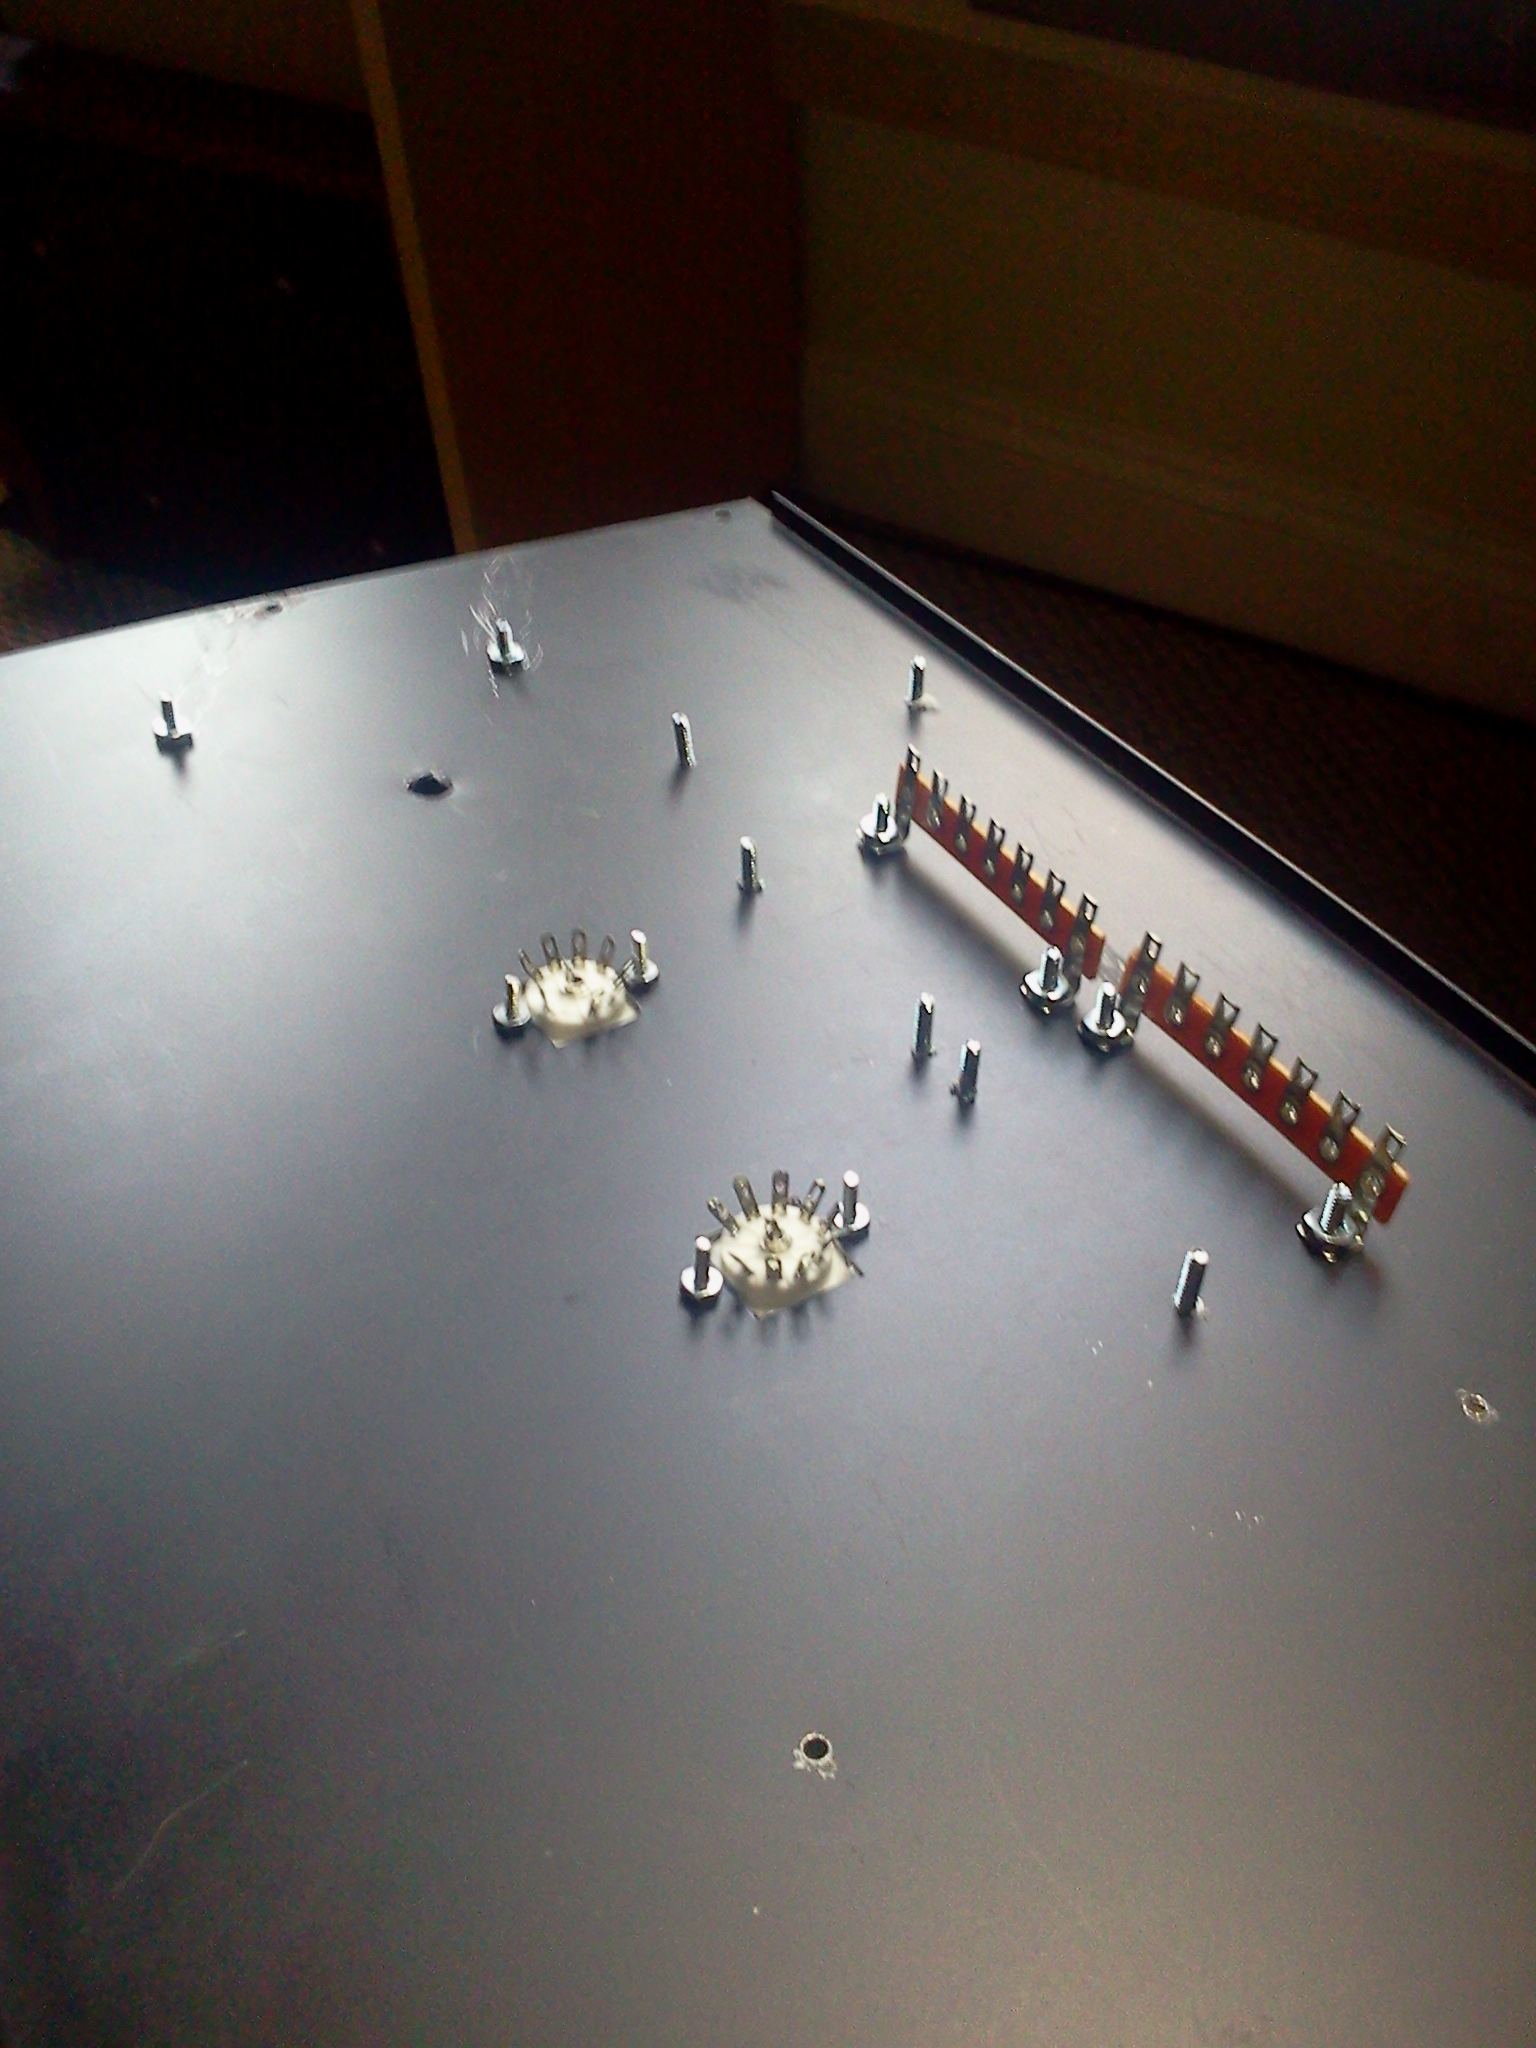
I used a hand drill with a 3/8 inch and 1/8 inch titanium drill bit to cut the necessary holes in the chassis. When cutting through metal it is important to keep the drill bit lubricated, so I would spray WD-40 on the tip while drilling. I cut the square holes for the tube sockets with a Dremel tool and heavy cutting wheel. The terminal strips are mounted to the top panel of the chassis by small nuts and bolts. I came up with the layout for the components on the terminals after a bit of brainstorming, and drew it on some graph paper. I went for a layout that would provide the most convenient and least cluttered wiring.
The project on a whole was not as difficult as I initially anticipated. I didn’t keep exact track, but I would estimate that it took less than 20 hours from start to finish. I am incredibly pleased with the way it turned out. It sounds absolutely fantastic, like a high gain monster straight out of the 1980’s. Though words can only describe so much, so watch the video below for a better idea of how this preamp turned out.
I took plenty photos while putting this together, but they are too many to display on this page. If you would like to see my photos of this preamp build from start to finish in all of their high resolution glory, you may download a zip here.


I just discovered the AX84 site today and i want to build my own tube pre-amp rather than full power amp. What modifications to their specs do you recommend for more distortion for metal (black metal and death metal)? My guitar uses EMG 81 and 60 pups converted to 18 volts, what pups are you using in this video?
My red guitar has the same pickups you’re using (at 9v) and my blue guitar has EMG H4/H4A pickups with PA-2 preamp. “Metal” distortion is pretty subjective. IMO the preamp with my mods is certainly adequate for most types of metal (any more gain and it just sounds like mush), as well as classic rock and whatever else you might want to throw at it. If you’re looking for a really “tight” crunch, you probably won’t be able to get that from tubes alone. Lots of guitarists use distortion pedals or boost pedals in front of their preamp/amp to change the character of the tube distortion more towards what they want. Personally I don’t like the way that sounds, this preamp on full gain gives plenty of chug and grind for any kind of metal I play.
I’d like to take a crack at building this. I like the sound. What type of power amp are you playing it through? Did different 12AX7’s yield different tones?
That would be really awesome if you did! Right now I have it going in to the power-amp input of a Fender 212r combo. Changing the V1 position 12AX7 from the short-plate Yamaha to a long-plate Sovtek really livened it up, though I’m not sure changing the V2 position tube would have much effect. I don’t recall if I had made this change before recording the video.
Is there a parts list available?
The rack-mount chassis was recycled from some old TV gear, so you’d need to figure out your own enclosure. I think I mentioned the Edcor transformer I used in the article. As for the rest of the parts, I didn’t really pick any particular brand. I just picked out the parts I needed with the proper spec, mostly everything can be acquired from Mouser.com. If you want a by-the-book list and design, you might want to start from here: http://ax84.com/hioctane.html which is the amp my preamp is based on.
Interested to build this for a friend. Did you come across any problems with blocking distortion along the way? How reliable has it been now that this much time has passed since building it?
Thanks for any info, Cheers!
If you follow the existing design, you shouldn’t run in to any problems with blocking distortion. It’s been very reliable, I’m still using it with the same tubes and haven’t blown a fuse or had any issues like that. Granted, I don’t move it around very much but it hasn’t caused any trouble. It would be a very cool gift for your friend, good luck!